Hearty Black Bean Soup

            “Writing is a lot like making soup. My subconscious cooks the idea, but I have to sit down at the computer to pour it out.”—Robin Wells


Are you kidding me? It was week filled with single digit temperatures. In spite of the fact we were burning a fire in our wood-burning stove and our thermostat was set of 62F degrees, the heater was still kicking on. Of course, much of that had to do with the fact that we have a long ranch-style house, so the heat was unable to warm the entire length of our house. Brrr . . .


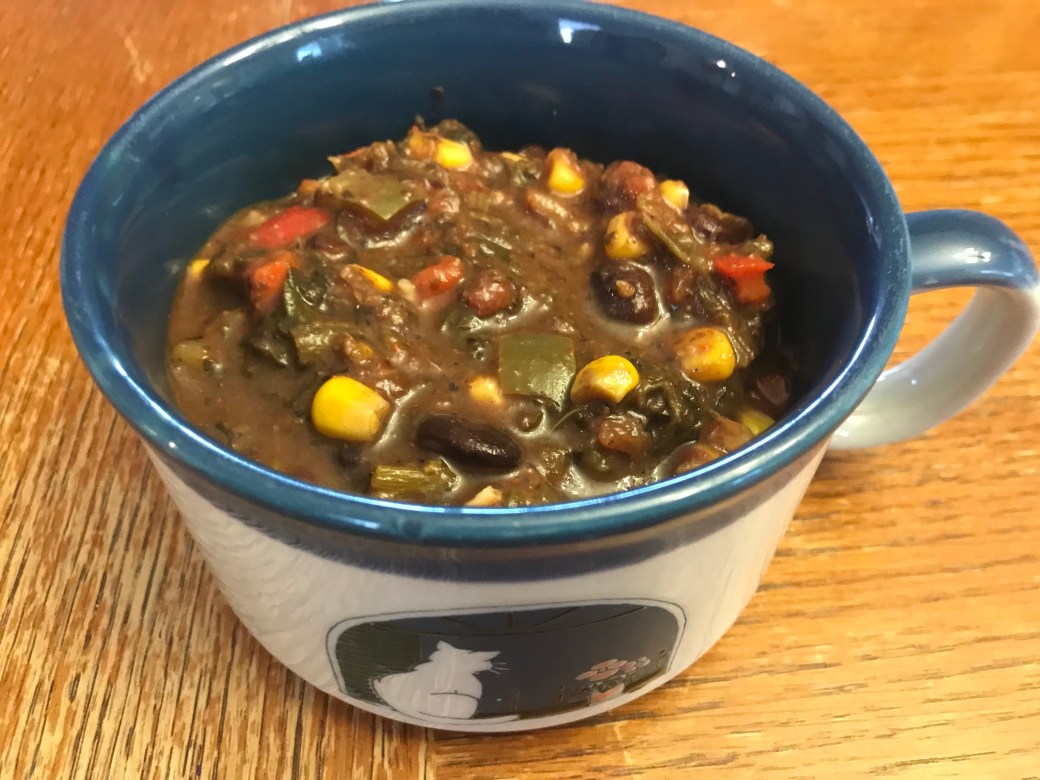
Below freezing weather calls for a hearty soup to warm the soul!


It seemed like a perfect week for soup! Black bean soup to be specific. Soup is not something we make year round. In fact, I go months without making it. However, nothing tastes better or seems to make the house feel warmer, than homemade soup cooking in the Crockpot!

IMG_3590

Nothing like the smell of homemade soup simmering in a Crockpot . . . .


I used to make black bean soup from dried beans, but as a multi-tasker when it comes to the various roles/jobs I juggle, time often slips away from me quickly. Therefore, I opt for healthy short cuts when I can. Thus, using rinsed canned beans works just as well for me when it comes to using beans in soups and chili.

IMG_3586

Drained and rinsed canned black beans & Mexi-corn.


This recipe is one of my favorites. It is a combination of several recipes I’ve tried over the years. All that past trial and error with black bean soup variations have informed the recipe-creation found below. It is beautiful combination of colors, flavors, and textures. Even my daughter, who is a very picky eater, likes this recipe because it is so similar to black bean chili.


You can serve this soup straight up in a bowl. It makes a super, or should I say, “souper,” dip into which to sink warm tortillas. However, it is also good to use when making nachos. In fact, this is my daughter’s favorite way in which to eat it. Additionally, you could use drained spoonfuls of it to create burritos, tacos, or enchiladas. Specifically, I have used leftovers of this soup to create a baked enchilada casserole. For cornbread lovers, this soup is great ladled over a crumbled up square, or two, of cornbread.


IMG_1899


Regardless of how you serve it, this black bean soup is, well, “souper” delicious! (Once again, I could not resist the chance to be punny!) It is versatile enough, so that whether or not you are serving a large family, or just cooking for two, the leftovers won’t go to waste. Plus, it freezes a well—another bonus! Additionally, it makes a great meatless meal for Lent, Meatless Monday, or any other time you would like to take a break from meat, but still want a hearty meal. Try this recipe out any time you want your body and soul warmed!

IMG_3608


From my home to yours, I wish you healthy, happy, homemade meals.


Hearty Black Bean Soup

Ingredients:

2-tablespoon olive oil (Can be made oil free and instead sauté vegetables in 2-tablespoons of broth.)

1 onion, diced (about 1 cup)

3 large cloves garlic, minced (about 1 tablespoon)

2 large bell peppers, preferably 1 green plus 1 of another color

1 stalk of celery, chopped

1 medium carrot, sliced

2 tablespoons chili powder

1-tablespoon ground cumin

1-tablespoon oregano

1 tablespoon cocoa powder

¼ teaspoon red pepper

Salt and pepper to taste

4 cups vegetable broth

4 cans (15 ounces each) black beans, drained

1 can (15 ounce) Mexican or whole kernel corn

1 can (14.5 ounce) tomatoes

2 cups frozen chopped spinach

Lime wedges

Directions:

Heat oil in large pot over medium-high heat.

Sauté onion, celery, carrots, and garlic for 5 minutes or until soft and onion translucent.

Stir in seasonings and cook for another minute or so.

Stir in broth, 2 cans of beans, and corn. Allow to simmer.

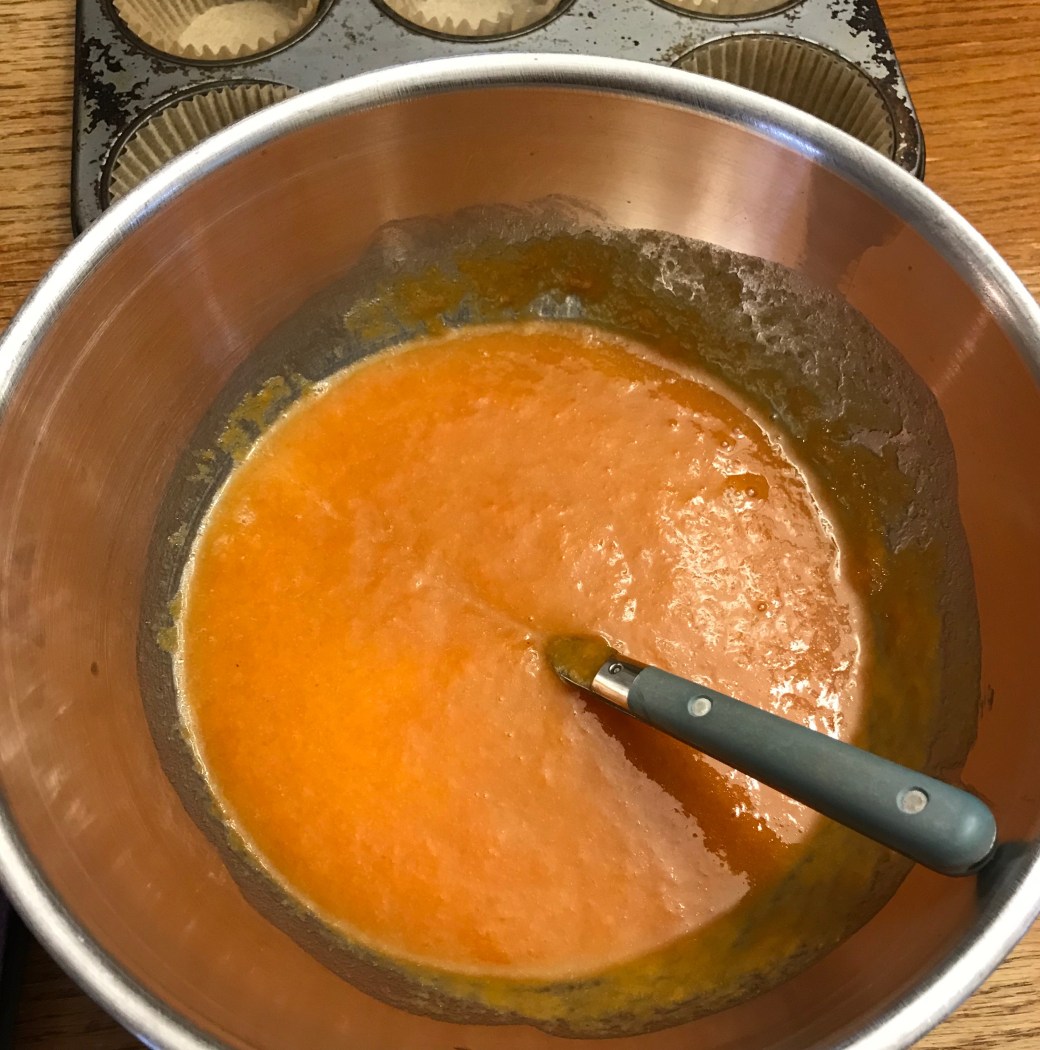
Meanwhile, in food processor or blender, process 2 cans of beans and tomatoes until smooth.

Stir into soup in mixture.

Stir in spinach.

Stir to boiling, reduce heat to medium and allow to simmer for 15 minutes; or, transfer soup into Crockpot and allow to simmer for several hours on low.

Makes 8 generous servings.

Serve with lime wedges to squeeze over soup once dished.

Leftover can be frozen for later dinners.


Gluten-free Blueberry Buckle

            “Advice from a blueberry: Be well-rounded. Soak up the sun. Find beauty in small things. Live a fruitful life. Be a good pick. It’s OK to be a little blue. Make sweet memories!”—Ilan Shamir


“Mom, why do you only make Blueberry Buckle for Christmas Brunch or when we have overnight company? Why can’t you make it more often . . .like when I come home this weekend?”


I was talking with my daughter, Madelyn, on the phone. She was coming home for a long weekend break from college this past fall. Her point was valid, I conceded, I did save Blueberry Buckle for special occasions. In the end, I agreed to make it this delectable breakfast treat more often, including the weekend when she came home.

IMG_3213

My husband, John, and I first discovered Blueberry Buckle in the early nineties when we frequently traveled to Staunton, VA, either as a weekend getaway, or as overnight stop on the way to or from the Outer Banks of North Carolina. In Staunton, we most often stayed in a bed and breakfast called, The Kenwood, and owned by the late Ed and Liz Kennedy.


Ed and Liz were complimentary pair. Ed, as best I recall, was scientist who retired from Corning. He was widely traveled, well read, and collector of nonfiction magazines such as the Smithsonian, American Heritage, and National Geographic to name a few. Happy to talk about nearly any given subject or offer advice for nearby historical sites, hiking trails, or scenic sites, Ed played the perfect gregarious host.

IMG_8647

Meanwhile, Liz, a retired nurse who spent her life working in inner-city Boston hospitals, was more reserved. She was happy to remain behind the scenes cooking breakfast, knitting, or watching baseball. That said, John and I visited their B & B so often, that over the years, Liz warmed to John and me, and often talked with us as much as Ed.


It was Liz who gave me this recipe for Blueberry Buckle. She preferred baking recipes like Blueberry Buckle that could be made ahead, cut into individual servings, and frozen. Then, she could take the amount needed the night before to thaw, and warm them in the morning. She served often served blueberry buckle with some form of protein, a fresh bowl of seasonal mixed fruit, and the customers’ choices of juices, coffees, and/or teas.

IMG_3607

I feel privileged to have this recipe because it was Liz’s policy to not share her recipes with customers at least not when they first began their business—and, we were their very first customers (but that is a different story for another day.) In fact, because we were frequent guests of their establishment, Liz would often come out after breakfast, sit down with us, and would talk for hours if we let her.


We enjoyed knowing Ed and Liz. We considered them friends. They were special people, and I think of them each time I make this recipe. Sharing recipes, such as this, is one of the reasons we love to travel—getting to know people from different geographic locations and experiencing “their” foods that we would have otherwise never before experienced.

IMG_3325

While the recipe I share with you is mostly true to Liz’s original version, I have made a few minor adjustments. First, and most obvious, I replaced regular all-purpose flour with a gluten-free version. If you do not need a gluten-free version, then by all means, use your favorite flour. Additionally, Liz did not use orange extract—it is a “trick” I learned from other recipes with blueberries. Thus, feel free to leave it out or replace it with another favorite extract. (I have even read Blueberry Buckle recipes that use lemon zest instead of any extract.) Finally, feel to use other types of berries, shredded apples, or even rhubarb in place of blueberries—you may then want to play with various additions to the cake batter, such as cinnamon, vanilla extract, etc.


From my home to yours, I wish you an abundance of happy, healthy, and homemade meals. . . and a vacation adventure filled with wonderful people and new foods to try!


P.S. You don’t have to save this recipe for overnight guests or once-per-year events. Just ask my daughter!


Gluten-Free Blueberry Buckle


Cake ingredients:

¾ cup sugar

¼ cup shortening (or plant –derived replacement)

1 egg (or equivalent egg replacement)

½ cup favorite milk

½ teaspoon orange extract

2 cups gluten-free all purpose baking flour (I prefer cup-4-cup brand.)

2 teaspoons baking powder

½ teaspoon salt

2 cups blueberries (fresh or frozen)


Topping ingredients:

½ cup sugar

1/3-cup gluten free flour

½ teaspoon cinnamon

¼ cup soft butter (or equal plant-based equivalent)

IMG_3596


Begin by measuring and setting aside ¼ cup butter (or plant based replacement) to allow it to soften.

Preheat oven to 375F degrees.

Prepare 9 x 9 square baking pan with nonstick cooking spray or coconut oil.

Begin with cake ingredients by thoroughly mixing ¾ cup sugar, shortening, and egg.

Stir in milk and orange extract.

In separate bowl, blend together gluten-free flour, baking powder, and salt.

Mix dry ingredients into wet ingredients.

Carefully blend in blueberries.   (If using frozen blueberries, you can gently shake them in a zip lock bag with a bit of flour to prevent, or at least reduce, the batter turning purple.)

IMG_3601

Spread batter into pan.


Reusing now empty dry ingredient bowl, (no sense dirtying another bowl) stir together dry topping ingredients: ½ sugar, 1/3 gluten free flour, and ¼ teaspoon cinnamon.

IMG_3593

Once dry ingredient well mixed, stir in butter with fork, mashing and blending until soft crumbly topping forms.

IMG_3595

Sprinkle the topping over batter.

IMG_3603

Bake 45-50 minutes or until toothpick inserted in middle of cake comes out clean. (Please note, if using frozen blueberries, you do not need to thaw; however, the buckle may take a bit longer to bake.)

Serves 9, but recipe can be doubled as I frequently do this.

Further, once cut into squares, it’s great to freeze ahead for quick morning reheats.


IMG_3599

Two types of gluten-free flour that I have used.

Faith is like Baking–recipe for Gluten-Free Chocolate Chip Pumpkin Muffins

            “God gives us the ingredients for our daily bread, but he expects us to do the baking.”—Chip Ingram

I stood there, contemplating the recipe. Would it be good? What if my modifications/changes to keep the recipe gluten-free, cause it to fall flat? Furthermore, what would my daughter and her friend think? I could be investing 20-30 minutes of my time that may ultimately end up wasted, and require me to start all over with something different. On the other hand, the recipe seemed to possess all the key ingredients . . .

IMG_3305

I was hoping to create muffins that were not only gluten-free, but also infused with much love and, of course, yummy flavors that would appeal to my daughter’s taste preference. I was putting complete confidence in a recipe I had never before made, created by a person whose recipe-website I had never before used. Hmm . . . That is when it hit me. Baking was similar to our faith life.

IMG_3270

According to Hebrews 11:1, “Now faith is the confidence in what we hope for, and assurance about what we do not see.” Furthermore, according to the dictionary, faith has two meanings: “Complete trust or confidence in someone or something;” or, “a strong belief in God.”

IMG_3365

Faith is as intangible as love; and yet, we all can recognize the feeling of love. Love, like faith, requires the proper ingredients, such as people, as well as loving actions. Examples of these ingredients in action might include (but certainly aren’t limited to): a man who thoughtfully writes a love letter to his beloved for no special occasion—only the feeling of love; the mother who painfully tells her child, “no,” not because she doesn’t want her child to be happy, but because she loves her child enough to give him boundaries; or, the grandchild who sets aside a work project, in spite of a pending deadline, in order to help grandparent. The point is, without the proper ingredients fueled by action, love may not thrive or grow. In fact, without action, love may stagnate, flounder, or perhaps even wither. Thus, it is with faith—and even baking!

Image

Faith, without the suitable ingredients that are further energized by a recipe for action, cannot thrive. While it is easy to say, “I have faith in God,” action is still required. Just as I could have stood at my kitchen counter stating that, “I have faith in this recipe,” but then didn’t make the muffins, did I really have faith?   Furthermore, there is no one action that defines faith, just as there is no one recipe to successfully bake muffins. Rather, it often those little, day-to-day choices and actions, that demonstrate, build, and foster one’s faith.


Compared to the steps for building one’s faith, baking muffins is relatively easy. I have read and baked a wide variety of recipes over the years to recognize what basic ingredients should be part of a quality baked good; therefore, it is a merely a matter of selecting a recipe with the flavors that suit my family’s taste buds. Then, the key is following the recipe, step-by-step, in order for the muffins to bake up into the consistency of a mini-cake with delightful aromas and delectable taste.

IMG_3283

Likewise, there is the Holy Scriptures, prayers, meditations, inspired readings, church, teachers, priests and/or pastors offering a plethora of recipes on how to put our faith into action—depending upon our innate taste preferences—by that I mean, the inner calling. For some, the inner calling may require a quite visible faith-recipe, such as, mission-work, ministering to the sick, teaching Sunday School classes, caring for the homeless, working in hospice, teaching children, and so forth. For others, their faith-recipe may be more reserved, but absolutely just as valid, such as a private prayer/devotional room, reading the Bible or other inspired/devotional type reading during a work break, being at the ready for service to others behind the scenes, being the person who is willing to take time to listen to co-workers, and so forth. Just as there are wide array of ingredients for serving up muffins, there are potentially an unlimited components for serving up faith.


However, just as muffins require certain basics in order for the chemical reaction to occur, turning individual ingredients into one tasty treat; faith, similarly, requires key elements in order to turn individual gifts into the beautiful body of Christ. For muffins, baking powder or baking soda, salt, flour, fat source, sugar, liquid, and egg are typical baking essentials. Likewise, faith also demands basic components, such as frequent encounters with the Scriptures, daily prayer/meditation, and regular guidance from a trusted priest, pastor, or teacher.

IMG_3274

The basics for muffins, such as flour, salt, baking powder/soda are required for any style muffins–just as our faith-life requires certain basics.


Once given the basics, muffins can be imparted with a multitude of flavors; however, if were not for the heat of the oven, no matter the quality of the ingredients, the batter would never change. Thus, it is with us. Our faith will only expand, just like my muffin batter, when heat is applied. It is through the extreme heat that the chemical reactions occur. Some recipes call for a bake time of 20-25 minutes in a 325-degree oven, while others require 45-50 minutes at 375 degrees. Therefore, it is worth remembering, (and I say this to myself as much as to anyone reading this) that when encountering the heat of our oven-of-life, no matter for how long or how hot, keep in mind the humble muffin. Then, allow those basic ingredients to provide you with the “assurance of what we do not see” while in the midst of life’s heat; and, may it allow us to confidently rely on our faith that all is at it should be in order for us to become “baked” into the best version of ourselves.

IMG_3271

The liquids without the basics ingredients and heat cannot become the dozen muffins–nor can we fully “become” without the basics of regular faith life actions.

Even when you combine the wet with the dry basics, without timed exposure to heat, muffins cannot come to fruition–neither can we without the ingredients of our faith recipe exposed to the heat of life.

P.S. I did bake the new recipe with a few modifications; and, my daughter and her friend indeed liked it. In fact, her friend ended up eating four! Therefore, I share my reconstructed recipe with you. I hope you will have faith to bake them up sometime!

The recipe follows below.

It is worth remembering the humble muffin when experiencing great heat from the proverbial oven-of-life.


IMG_3363


**Gluten Free Pumpkin Chocolate Chip Muffins

 ¾ cup white sugar or equivalent substitute, such as Stevia

¼ cup oil (vegetable, coconut, or even applesauce, if you prefer no additional fat)

2 eggs (or equivalent substitute)

¾ cup canned pumpkin

¼ cup water

1½ **gluten free all-purpose flour (I prefer Cup-4-Cup brand.)

¾ teaspoon baking powder

½ teaspoon baking soda

¼ teaspoon salt

1-teaspoon pumpkin pie spice

½ cup semisweet chocolate chips

(**You do not have to use gluten-free flour if you do not need/want it.)

Directions:

Preheat the oven to 400 degrees.

Line muffin pan with parchment papers or grease.

Mix sugar, oil, and eggs.

Add pumpkin and water.

In a separate bowl mix together the baking flour, baking soda, baking powder, spices, and salt.

Add wet mixture and stir in chocolate chips.

Fill muffin cups 2/3 full with batter.

Sprinkle tops with love dust; a very light dusting of sugar, if desired.

Bake in preheated oven for 20-25 minutes.


New Brunswick Bar Clams

            “Oh, bar clams are so good. You could eat them right out of the jar!”—Vincent Theriault


This past summer, our family spent two weeks visiting the Canadian province of New Brunswick. It was a third visit, but our first time staying just outside the mostly French speaking community of Petit -Rocher. The house in which we stayed, found on Air BnB, was beautifully situated on the Bay of Chaleur.

IMG_0932
Arriving to the vacation cottage in which we stayed off the Bay of Chaleur in Petit Rocher, New Brunswick


It has been our experience that the maritime provinces of Canada possess some of the warmest, most friendly people. This summer’s trip was not an exception. The neighbors to the right and left of our house were often visitors to our evening campfires, and we welcomed them with delight. In fact, by our last night, we were hanging out at one neighbor’s campfire, the Roy family.

D0B9C43B-D7D3-49A6-BDF6-A1B8E466ED6B
Starting the campfire before darkness falls. Petit Rocher neighbors would stop by this campfire during the evenings to chat.


The Roy family welcomed us into the neighborhood on the first sunny day. (We arrived in the midst of a rainy cold front; and thus, the first couple of days were wet, cool, and not suitable for building a fire.) Bobby Roy was the first to introduce himself, soon followed by his son Denis. As the weeks progressed, we met more members of this gregarious and outgoing family.   They were great neighbors, and we now treasure fond memories of our time spent together in this picturesque setting.

Denis and his father, Bobby, were frequent evening visitors!

In fact, the Roy family was so generous, by the end of our first week; they had presented our family with an official Canadian flag that we flew proudly while staying there. John, my husband, was bestowed with a stylish Canadian ball cap. Furthermore, we were also given a jar of a New Brunswick delicacy, bar clams. Both Denis and Bobby stated the bar clams would make great chowder. I proudly took these into the vacation home in which we were staying; set the jar on the counter with the full intention of eating them while we were there.


On previous trips, we stayed in Janeville, NB, also on the idyllic Bay of Chaleur. During our first trip there, we made friends with another family, the Theriaults, Vincent, Gisele, and their dog, Bijou. On this last trip, however, we were located about 40 minutes north of them. Wonderfully, though, we were able to get together with them a couple of times during this same visit.

24336CD9-D3AB-4A63-A4AD-28DB7A03324D
Vincent Theriault, John, Maddie, me, and Gisele Theriault when we first met in Janeville, New Brunswick. The house (church) in which we stayed is in background, and their summer cottage is directly behind us.


It was during a dinner visit with Vincent and Gisele, that they happened to notice the jar of bar clams on the kitchen counter. They both shared with us how tasty the clams were. In fact, they stated that the clams could be enjoyed as a delicious meal straight out of the jar! Simply add a salad and a loaf of crusty, buttery bread; and, boom, dinner is served.


Ultimately, the clams came home with us still uneaten. John researched alternate ways to prepare these clams in addition to the methods described by the Roy’s and Theriault’s. He landed upon an idea—pasta.

IMG_2702


Hmm . . .I liked that idea, but I would have to choose the pasta carefully because it must be gluten free due to my celiac disease; and trust me, not every gluten free pasta is tasty. However, I had recently tried one called POW, made out of mostly green lentils, that John even found appetizing. Therefore, I began brainstorming.


I could make the sauce completely from scratch. However, given the limited time during the workweek, I opted for a shortcut instead, and came up with plan after a visit to my favorite grocery store, Route 60 Kroger. I perused their aisle and purchased the following items: spaghetti squash (What’s not to love about this vegetable?), POW pasta, one jar of Classico brand Riserva Alfredo sauce, a can of Bumble Bee brand Red Clam Sauce, a bag of frozen peas, and a can of mushrooms (although any fresh variation of mushrooms would nice) as well as a can of fancy white crab meat (for an increase protein), and finally, a wedge of parmesan cheese.


IMG_2701

Ingredients gathered for Bar Clam pasta with an appetizer of cheese and prosciutto!


Later that week, John and feasted on scrumptious bar clam pasta! The first night, I served my sauce over spaghetti squash only, while John ate the pasta. The next night, however, I combined the left over pasta and squash into a large casserole dish, poured the sauce over it, and topped it off with a bit of shredded cheese. This turned into a flavorsome casserole, which fed the two of us two more nights!

First night’s meal.


In fact, we loved this dish so much, that I have already purchased the ingredients to make it again—only we will have to settled for canned clams, instead of the fresh New Brunswick clams. Hopefully, it will still be a just as tasty!

Leftover night!

Thank you, Roy family, for generosity and hospitality as well as introducing us to a new food! Thank you, Vincent and Gisele, for your generous encouragement! While we did not have crusty bread, we did serve this wonderful meal with a simple salad, and savored pleasant thoughts of the wonderful people are fortunate enough to call friends from New Brunswick!


Bar Clam Pasta

 1 spaghetti squash

1 box Ancient Harvest brand POW! Pasta (or your favorite brand/type pasta)

1 15 ounce jar of Classico brand Riserva Alfredo sauce

1 15 ounce can of Bumble Bee brand Tuscan style Read Clam Sauce

1 jar/can of bar clams or baby clams (size will vary depending upon how much you want, and brand you use)

1 6 ounce can fancy white crab mean

1 cup frozen green peas–optional

1 can or package of mushrooms—optional

Red pepper seeds, if desired


Preheat oven 375 degrees.

Coat long casserole dish with nonstick cooking spray.

Cut spaghetti squash lengthwise and remove seeds.

Place squash halves flesh side down in pan.

Bake 45 minutes or until flesh is tender and easily pricked with a fork.

Cook pasta according to package directions.

In large saucepan, combine both Alfredo sauce and clam sauce.

(I also add half-cup water, or milk, to the emptied Alfredo sauce and shake to fully get all sauce, but it is not necessary.)

Warm gently to a slightly bubbly stage.

Gently stir in crab, clams, peas, and mushrooms (if using)—do not boil—rather return to slightly bubbly stage for a few minutes.

Stir in ¼ cup shaved Parmesan cheese if desired to thicken sauce.

Cover and turn off sauce.

Once squash is baked, remove from oven.

With hot pads, flip squash over, flesh face up, and allow to cool.

Once cooled enough to handle, use large spoon to scoop out flesh into dish.

Separate flesh with fork and season with olive oil and sea salt if desired.

Ladle sauce over desired pasta, squash, or a combination of both.

Top with additional Parmesan and/or red pepper seeds.


When cleaning up after dinner, place left over pasta over top of squash and fold together.

Pour remaining sauce over the combined pasta and squash.

Top with desire amount shredded cheese, if desired.

Spray dull-side of foil with nonstick cooking spray. Then, place coated side of foil face down to cover pasta dish.

It will be ready to bake the next night in a preheated 350-degree oven covered for 20 minutes.

Remove foil and bake an additional 10 minutes, or until cheese is golden and sauce is bubbly.


Maddie’s Last Saturday before Bethany College & Blueberry-Pumpkin Muffins

“You’re off to great places. Today is your day! Your mountain is waiting, so get on your way!”—Dr. Seuss

9CDC2C3F-590A-4E57-B5EF-65F5D29A2592
Located on a mountain in Bethany, WV– adventure awaits Maddie at Bethany College.

I was folding laundry this past Saturday evening inhaling the aroma of fragrant, fresh fabric as its warmth wafted through my fingers. Gazing out the back laundry room window, my eyes fixated upon the sadly abandoned swing-set in our back yard. Suddenly, my mind’s eye transported me back in time to the scent of sweaty-headed summers.

C1860161-3366-4120-B2F8-535B60682D68
The view from my laundry room window as I folded laundry on the Saturday before Maddie left for college.

My hand lightly grazed the window in a desire to touch that time when kids climbed all over that swing-set, and their calls echoed throughout the valley that is our backyard. Shaking my head out of its reverie, I returned to my task at hand. As I folded both Madelyn’s, my daughter, and my clothes, I realized this would be her last Saturday home for quite possibly months; and how similar, yet different, it was to other Saturdays of her youth.

EB85C45A-6A6B-4B05-A4E4-8DA94A008B62
This picture was taken the day Maddie’s swing set was being built. Her face is flushed from playing in the summer heat. 

Our day had started semi-early–as early for Maddie is not as early as when she was younger. Instead of taking the Proctorville Bridge to the YMCA soccer field along WV 2, as we have done every Saturday in August since she was the age of four, we instead took the same bridge, but headed up WV 60 to Merritt Creek Starbucks for a light breakfast before beginning the last lit bit of college shopping for her.

As a child and teen, upon arriving at the soccer field, Madelyn would have quickly exited the car to catch up with friends and teammates. Saturday, as I drove, she alternated between talking with me and texting her friends. Like so many other Saturday mornings, by noon, she was already asking if I minded if a friend came over to spend the night. Thus, we finished her shopping while she simultaneously texted and called her friend to finalize their sleepover plans.

Once home, instead of bursting through the back door and immediately linking up her friend to play with the neighborhood children on the swing-set, Maddie and her friend hung out in the jungle gym of Madelyn’s bedroom. They called other girls on speaker-phone, engaging them in conversation while Maddie’s friend tried on clothes, jewelry, and make-up that Maddie was purging as she packed for college.

44206BC7-0306-4346-8E87-6C6CDE0BA79A
Leah Moss, one of my Maddie’s friends in our neighborhood, playing in & around back yard.

It reminded me of the not-so-long-ago dress-up box that Maddie possessed for indoor play. The box was filled with only-worn-once-costumes from Halloween and ballet recitals as well as pieces of jewelry, hats, make-up, nail polish and other accessories. How many times over the years had and that box provided a source of great entertainment for Maddie, her friends, and her cousin. Now, it was as if that box had reappeared as Maddie’s friend modeled the Halloween costumes, dance dresses, as well as pieces of jewelry and makeup from Maddie’s years in high school. This time, however, instead of returning those items to a special play box, her friend will take these items to use for her own special high school “play” days.

Laundry folded and put away, I began the process of making pumpkin-blueberry muffins—a favorite of Maddie’s. Like a magnet, the swing-set beckoned my eyes to glance out the back kitchen windows as I worked. How many times have I baked those spicy, sweet muffins for Maddie and her friends over the years while watching them play in the backyard on that seemingly magical swing-set? My goodness, it was only yesterday, wasn’t it?

I glanced over to the backdoor as if imploring it to open with the rush of the sounds of a barking dog and the squeal of Maddie’s voice as she, and a long ago sleepover friend, scrambled into the house declaring they’re, “sweating-up”, and can they please watch a movie while they wait for dinner. Soon enough, the family room would be filled the sounds of some musical as Maddie and her friend sang and danced about the room. My husband, John, and I knew so many of those songs by heart; we would often join in the singing and dancing as Maddie and her friend laughed at us.

Though that backdoor never opened, Maddie and her friend walked through the kitchen, taking a break from Maddie’s packing; and, as if reading my mind, asked if John and I minded if they watched a movie. Soon enough, the sound of a musical pervaded the family-kitchen-dining room area, just like years ago. Sure enough, it did not take long for John and I to begin singing and dancing along with the girls as they giggled at the sight and sound of us.

With the muffins in the oven, and their all too proverbial aroma filling the air, I turned my attention to dinner. Nothing fancy–salad, pizza, and chips—a supper we have eaten on so many Saturday evenings as a family. It is the one meal we will often eat in the family room, instead of at the kitchen table, especially if we are watching a movie or enjoying a fall football game.

As I sat on the couch eating, legs folded under me, John seated beside me, with Maddie and her friend on the floor alternating between eating, singing, and painting their toenails, it felt as if nothing has changed. Tomorrow morning I would wake up early and write most of this column before the rest of the house is awake. Most likely, the girls will get up, watch another silly movie; and, before long, the house will be filled with sound—sounds that will not be present next weekend. Sounds that have been part of my life for the past 18 years. Sounds that fill our home with peals of laughter and joy. Sounds that are so much a part of my heart, my soul, my being . . .

Thursday, the day this piece of writing will be published, is the official move-in day for our daughter at Bethany College, nestled on top of a mountain just outside of Wheeling, WV. John and I will soon return to the valley of our home. The swing-set will remain unmoving outside of our back windows beckoning for a girl who is no longer home. I wonder if I bake pumpkin-blueberry muffins next Saturday, if they will still smell as sweet they did this past weekend?


Simple Pumpkin Blueberry Muffins

(Can be made gluten-free)


1 box spice cake mix (I use a gluten-free version due to my celiac disease.)

1 can pureed pumpkin

1 egg

1 small pint of blueberries (2 cups frozen)

Optional: I like to add 1-teaspoon vanilla, but it is not necessary


Preheat oven to 375 degrees.

Line muffins tins with parchment muffin cups.

Stir together cake mix, pumpkin, egg, and vanilla (if using) until batter is just combined.

Gently fold in blueberries.

Divide evenly among muffin cups.

Optional: Sprinkle tops with a bit of sugar.

Bake 25-30 minutes, or until toothpick is comes out clean when inserted into middle of a muffin.

Cool 5-10 minutes before serving.

Store either in refrigerator or freezer for quick breakfast/snack reheats.


Protein Pancake

What’s not to love about a pancake, especially one that’s primed with protein?!?!  Plus, like a painter’s blank canvas, protein pancakes can be flavored and/or topped with a wide array of healthy ingredients.  I know what you’re thinking, but I don’t have time to make pancakes in the morning.  I have two possible solutions for you–make your pancakes ahead of time, or multi-task while making this fresh in the morning as it takes about 5-10 minutes of cook time, depending upon how hot your griddle or stove runs.

Starting your day of protein has numerous advantages.  To begin, starting your day with a protein-rich breakfast supplies your stomach with nutrients so that it feels full and reduces your desire to eat when you arrive at work.  Plus, it allows your body to maintain a lower level of a hunger-stimulating hormone called ghrelin–which can help reduce those brain-related “cravings.”  Additionally, people who consume high levels of protein in the morning typically consume less unhealthy, fatty foods later in the day.  Finally, some studies even indicate noshing a high-protein breakfast within 30-60 minutes of waking up not only jump start their metabolism, but often end up taking in 100 or so fewer calories per day.

Why not indulge in a tasty protein pancake for your next breakfast??  You can use your favorite protein powder, so it can be gluten-free (or other allergen-free), vegetarian, vegan, or animal based–the choice is yours! What’s more, your stomach, mind, and body will thank you later!

Steph’s Basic Protein Pancake Recipe

1 scoop or packet of your favorite protein

1/4-1/2 cup water, milk, or milk-product (The less liquid, the thicker the pancake)

1-2 egg whites (depending upon your protein level requirements–plus, egg white gives it a nice, fluffy texture)

1/8 teaspoon baking powder

Dash of salt (I use pink himalayan salt.)

Now, feel free to pick as many of the following add-ins as your taste and nutrition requirements prefer:

1/4 – 1/2 cup favorite berry

1 teaspoon – 1 tablespoon chia seeds, flax seeds, hemp seeds, etc . . .

1 teaspoon – 1 tablespoon cocoa powder

1 teaspoon – 1 tablespoon powdered peanut butter

1 packet of sweetener, especially if using cocoa (I prefer Stevia based sweetener.)

2 teaspoons –  1/4 cup oats or oat bran (for thickness & heartiness–only if desired)

1/4 – 1/2 teaspoon ground cinnamon, nutmeg, ginger, etc . . .

1/4 – 1/2 teaspoon vanilla extract (or maple, coconut, lemon, orange, etc. . .)


Coat griddle or small pan with nonstick cooking spray, butter, or coconut oil, and preheat to medium. (You’ll know it is warm enough if a drop of water “skitters” (bounces) across surface.)

Meanwhile, combine dry ingredients first, and then add wet.

Stir until protein powder had dissolved, but lumps may remain, depending upon additions.

Pour onto preheated pan.  If possible, cover.

Leave alone, and do not flip for 5-9 minutes until bubbles form across entire top of pancake and edges are firm when touched with a spatula. (While cooking you can pack your lunch for the day, check your Facebook or Instagram account, or even dry your hair!)

Using a large spatula, flip entire pancake over with one quick, fell swoop.

Turn off heat and allow to sit in pan for approximately 2 minutes.

Serve immediately; or allow to cool, and store in resealable bag in fridge for up to 2 days until ready to eat.  Then, simply reheat and enjoy!

Makes one large protein pancake!

Top with your favorite topping!

**In picture, I have topped my gluten-free, vitamin and protein enriched pancake with 1-tablespoon of powdered peanut mixed with 2, or so, teaspoons of water.  I sprinkled that with a few Enjoy Life brand (gluten-free) semi-sweet mini-chocolate chips for the picture!  Please contact me if interested in finding out more about protein source I used!

IMG_1073


My favorite green tea mock- or cocktail

My husband, John, loves iced green tea–especially during the warm months of summer.  I suspect he loves the clinking sound ice makes in his glass, but I’ve been known to be wrong about motives!  Perhaps, instead, he loves the fresh lemon slices I keep on hand for our tea.  Then, it again,  it could be that he’s been reading WebMD, and he is fond of the antioxidants green tea possesses as well as the fact that 2013 review of literature reveals that green tea improves blood flow and lowers cholesterol.  Regardless, green tea’s refreshing, light taste makes it the perfect summer drink for anyone, including John!

I tend to make our pitchers of iced green tea out of decaffeinated tea bags, so we can drink the tea all day long without worries of evening jitters.  Further, decaf tea is not dehydrating like caffeinated drinks tend to be–an important factor to consider when the summer temperatures begin to soar.  That said, the recipe that I will share with you can be made with either regular tea or decaffeinated tea.

Walking down the beverage isle of my grocery store, I noticed all the tea flavored waters, tea drink brands, and flavored teas. A bit later, I wandered into the beer/wine section of the store and spied a wide array of “spiked” or “hard” teas. This led to me wondering, why not make these at home?  Then, you can make any flavored tea beverage you like with as little or as much flavor enhancer as your taste buds prefer; and, they could be non-alcoholic, or spiked, depending upon your preference!

Creating flavored tea is as simple as combing your glass of green tea with your favorite pure extracts, juices, or even those flavored water enhancers, such as Crystal Light, Mio, or Stur, a product that states to be an all-natural stevia based product.  Furthermore, adding fresh sliced citrus fruits, muddled berries, or crushed fruit flesh, such as watermelon are other simple, natural, and tasty tea flavor enhancers.  The fun comes from playing around with different add-ins, until you find the combination(s) that suit your current mood or taste preference.  One night, try adding in pomegranate juice; whereas, the next night try muddling fresh berries in the bottom of your glass before pouring in your green tea and adding ice.

Want an antioxidant rich cocktail?  Try adding any of the above additions as well as an ounce (or so) of your favorite clear liquor, such as vodka, tequila, or rum.  Plus, there are all varieties of flavored liquor that might be worth exploring on a Friday night!

Why not try brewing up a pitcher of iced green tea using my recipe below?  Then, grab some friends, family, and plenty of glasses, so the experimenting can begin!  The variety of flavored teas you create are only limited by your imagination!  (Send me pics of your creations!)

From my home to yours, I wish you healthy, happy, homemade meals, or in this case, beverages!  Cheers! (Cue the sound of clinking glasses.)

Steph’s Favorite Green Tea

8 bags green tea (either with or without caffeine is fine.

3 cups almost boiling water

3 cups chilled water (or ice)

1/2 cup (more or less to taste preference & sweetness of products you’ll be adding in) of your favorite sweetener (I prefer Stevia based products)

Prepare 8 tea bags for brewing.

In a teapot, bring fresh water to a near boil.  

Using a heat resistant measuring cup, measure and pour 3 cups worth of near boiling water into a heat-resistant pitcher over tea bags.

Allow to steep 5 minutes.

Gently squeeze excess tea from tea bags and remove from pitcher.

Stir in 3 cups of chilled water or ice.

Stir in favorite sweetener, and refrigerate until ready to serve.

Makes 6-8 glasses.  

When ready to serve, let the creative play with favorite add-in begin with each glass!  

Tip:  Drink this tea up within 2-3 days as it develops an odd flavor if allowed to get old.