Berry Immunity Boosting Smoothie aka Stress Less Smoothie

The greatest weapon against stress is our ability to choose one thought over another.”–William James

Photo by Pedro Figueras on Pexels.com

The challenge of work-life balance⚖️

It is not uncommon to engage in conversations centering around stress.  Attempting to balance the demands of work and life can be challenging. The combination of long work hours, while also juggling the needs of family, make it difficult to have time to do the things that would otherwise relieve stress, such as regular exercise, outings with friends, or even a relaxing soak in the tub. 

When stress ramps up, there is a chain-reaction in our bodies.  According to Harvard School of Public Health, when stress is high, the body’s demand for oxygen and energy increases, which in turn increases the demand for key nutrients.  Simultaneously, stress causes the body to eliminate other vital nutrients. This can take a toll on the body’s immune system.

As the chain reaction of stress continues, hormones become affected.  If the stress is acute, the body will secrete adrenaline, which suppresses appetite.  However, when the stress becomes more chronic, cortisol levels begin to rise, instigating food cravings.  Cortisol tends to create cravings for foods that are typically considered “comfort foods,” full of sugar, salt, and fat.  Unfortunately, if cortisol stays elevated, the chain reaction continues to wreak havoc upon our bodies, and this often influences our coping strategies.

Photo by cottonbro studio on Pexels.com

The body’s stress response 😰

Chronic high stress time periods, depletes the body of energy and can often reduce time available for decompression. This can inhibit the desire to prepare healthy, nutritious meals.  Sometimes, chronic stress causes us to skip meals.  The downside to skipping meals is that, as the cortisol levels rise, once there is an opportunity to eat, we tend to reach for those comfort foods that will not replenish the body’s stores of diminished nutrients.

Therefore, how we respond to stress matters.  With some situations, we can identify upcoming stressful time periods before they begin, and thus, we can be more proactive.  However, that isn’t always the case.  Nonetheless, there are a few basic guidelines, according to The University of North Carolina at Chapel Hill that are worth remembering.

Photo by Antoni Shkraba on Pexels.com

Tips for eating during times of stress 😣

  • Keep nutrient-dense grab-and-go snacks on hand at all times.  Foods like baby carrots, celery sticks, hummus cups, guacamole cups, apples, oranges, bananas, popcorn, almonds, walnuts, pistachios, low-sugar yogurt, low-sugar granola, low-sugar oatmeal packets, whole-grain crackers and so forth.
  • Eat at regular intervals when possible.  This will keep blood sugar stable, and keep the brain, which needs glucose, working at its best.
  • Eat high-fiber foods. Foods, such as fruits, vegetables, nuts, seeds, beans, oatmeal, and other whole grains, have been shown to decrease perceived stress levels and increase alertness.
  • Focus on eating fruits and vegetables, especially leafy greens, whenever possible.  These foods are filled with the vitamins and minerals your body needs to neutralize the harmful molecules our bodies produce when under stress. 
  • Foods rich in unsaturated fat also help. Think walnuts, flax seeds, chia seeds, and fish oil to name a few. These foods are associated with increased brain function; however, deficiencies in fatty acids can result in depression and/or anxiety. 
  • Be mindful of caffeine and/or alcohol intake. Both of these can disrupt sleep, which the body desperately needs during times of stress.  Additionally, both can increase blood pressure, which can increase feelings of anxiety.
  • Ensure your body is getting enough quality sleep. Getting enough sleep allows the body to reduce cortisol levels and other stress hormones, increasing the chances of remaining calmer in the face of stress.
  • Employ constructive coping strategies. Whether it is talking to a trusted friend or therapist, journaling, meditating, asking for help, or going for a walk–developing positive coping skills is a lifetime skill set. 
Photo by Wallace Chuck on Pexels.com

The reality of stress 😩

Stress is reality at different points in our lives.  While we cannot control when it will arise, we can control our response to it.  It is easy and understandable to seek comfort during times of stress.  However, when those sources of comfort become unhealthy coping mechanisms, such as over- or undereating, drinking alcohol in excess, going without sleep, and so forth, we risk using short-sighted solutions that could lead to developing long-term problems, creating even more stress.  

Stress less smoothie 🍓

Below is my newest smoothie creation.  It is full of nutrient-rich foods that are high in fiber.  Some of the ingredients may cause you to raise an eye-brow in wonder, but I promise, it does taste great.  That said, feel free to adjust, add to, or eliminate ingredients that don’t suit your palate or dietary needs.

This recipe can be made ahead of time and frozen into individual servings.  They will stay fresh in the freezer for up to three months.  Then, whenever faced with a stressful day, take one smoothie out the night before, set it in the fridge to thaw, and then it’s grab-and-go convenience for the next workday. Sip on it through a lunch meeting, or if more time is available, pour it into a bowl and sprinkle on favorite fruit and nut/seed toppings, along with a bit of granola. 

I can’t promise that this recipe will change the stress around you. However, it does provide a powerful nutritional punch to help stave off the effects of stress, and offers one less thing to worry about.  Plus, it feels good knowing that if everything else goes wrong in the day, at least one small part of your day was stress-free.  

Cheers to one less thing to stress about!

Berry Stress Less Smoothie

Nutrient dense, stress combating meal replacement

Ingredients:

2 cup spinach, riced cauliflower, or kale (can be frozen)

½ cup strawberries, frozen

½ cup raspberries, frozen

½ cup cherries, frozen

1 apple

½ cup lentils

1 parsnips

2 tablespoon flax, chia seeds, or hemp seeds (or combination of any two)

2 tablespoons goji berries, OR 2 medjool dates, OR 2 prunes, optional

2 tablespoons cocoa or cacao powder, optional

2 scoops protein powder, optional

1 cup beet juice (can use pomegranate or cherry juice or simply use water)

1 cup milk  plant or dairy based variation)

½-1 cup of water, if too thick

Directions:

Put all ingredients in high powered blender

Blend until creamy and smooth

Makes 2 large servings 

Springtime Celebration Salad with Walnut Vinaigrette

Featuring asparagus, strawberries, spring mix, and spinach

“Mother Nature’s powers cannot be stuffed into a pill.”–Dr. Micheal Gregor

Photo by Anna Shvets on Pexels.com

pill popping 💊

My husband, John, and I can’t help but giggle every time we see commercials touting the benefits of taking a certain brand of daily vitamins.  This company claims their product provides vitamins and minerals found in fruits and vegetables that we, the lowly consumer, don’t have time to eat.  It especially targets those of us who are older, espousing that by taking these pills, as many as six per day, we will infuse our frail, feeble frames with the vigor and vitality of our former, younger self. 

While there is nothing inherently wrong with taking a multivitamin and/or other key supplements, they should never replace our need for daily consumption of fruits and vegetables.  According to multiple sources, such as,  The Better Health Channel, National Institutes of Health, and Harvard’s T.H. Chan School of Public Health, regularly consuming fruits and vegetables provides the body with important vitamins, minerals, plant chemicals, and a significant source of fiber.  Furthermore, a diet rich in fruits and vegetables have been linked to “lowered blood pressure, reduced risk of heart disease and stroke, prevention of some types of cancers, lowered risk of eye and digestive problems, and have a positive effect on blood sugar . . . .”   These are benefits that can’t be bottled into a pill.

Photo by Pixabay on Pexels.com

Planted in Health 🌱

Of course, I am preaching to the choir, my dear readers.  If you are reading this, you are keenly aware of the benefits fruits and veggies offer.  And, yet, due to clever and slick marketing tactics, Americans have been spending billions in recent years on vitamins and other supplements according to Northwestern Now and Harvard Medical School.  While there are those who do need a few key supplements due to specific health issues, such as those with Crohn’s disease, celiac disease, and ulcerative colitis to name a few, the average healthy adult can get all the vitamins and minerals they need through a well-balanced diet.  Besides, there are numerous tasty and simple ways to incorporate fruit and veggies into your diet.

Photo by Michael Burrows on Pexels.com

Spring produce 🥬

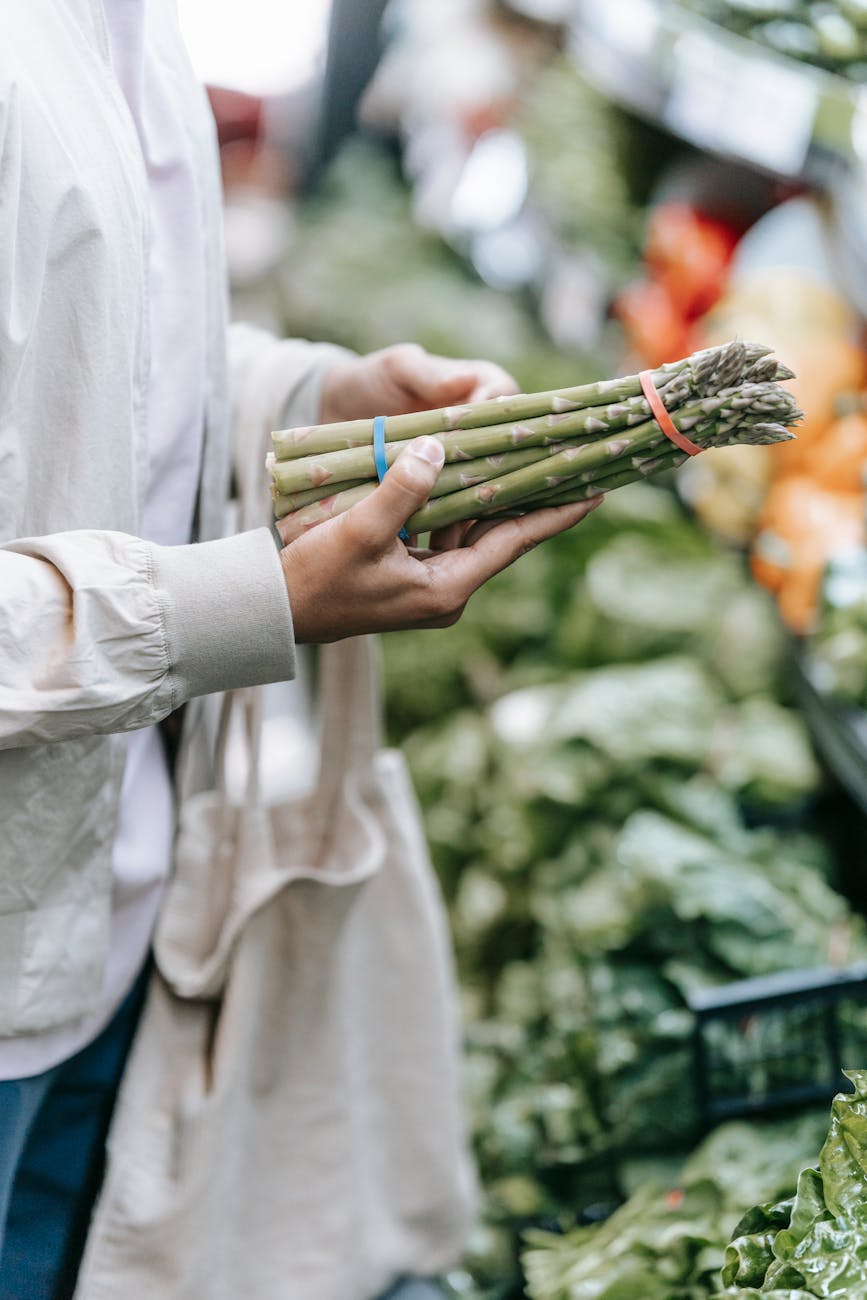
Spring is the perfect time to take advantage of the fruits and vegetables that come into season early, such as greens, asparagus, and strawberries.  Many of these items are often available at local produce stands and markets.  Plus, they can also be found, usually at discounted prices when in-season, at local grocery stores.  Either way, from now until early June, is the perfect time to grab up these produce deals.

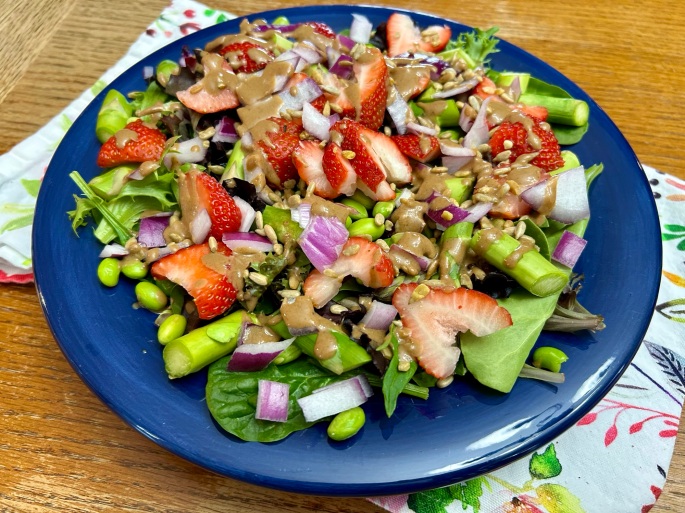
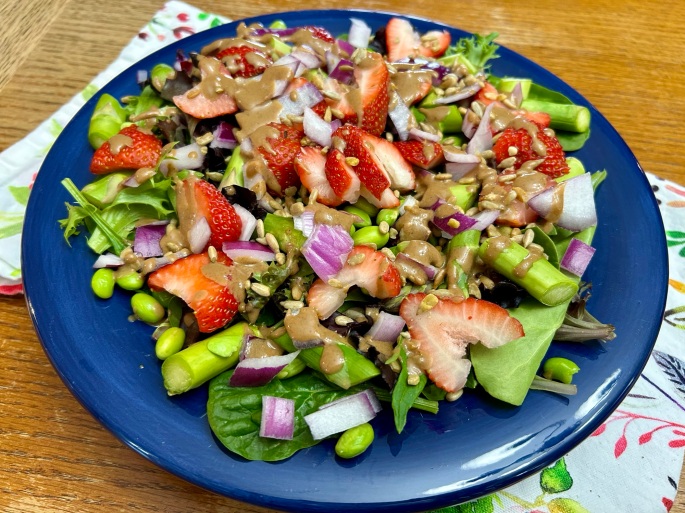
Springtime celebration salad

The salad recipe I am sharing with you is one delicious way to incorporate a variety of spring vegetables and at least one fruit into your day.  It is a bright and colorful salad, bursting with complimentary flavors and textures, and it can be made as a light main dish or a bright start to a meal.  Feel free to play with this recipe by using your favorite dressing, replacing the strawberries with another fruit, changing up the greens and vegetables, or by adding in a favorite protein, bean, or even a grain, such as quinoa.

Make it ahead of time 🥗

I made this salad recipe ahead of time without the fruit and dressing, divided it among Tupperware-type bowls, placed the fruit and poured the dressing into separate, small containers to add to the salad just before eating.  This allowed grab-and-go convenience for lunch.  In the morning, I popped open my lunch bag, filled it with salad, dressing, sliced fruit, and tossed in a handful of whole grain, gluten-free crackers. As I head out the door,  I can rest assured I have packed a nutritionally balanced lunch to fill my afternoon with energy, and I won’t need to worry about spending extra money on overpriced and over-advertised pills.

Celebrate Early Spring produce 🎉

Consider adding this salad into your weekly rotation of spring meals.  Serve it as a meal or as a side.  Toss it up ahead of time if you like– simply add in the fruit and pour on the dressing just before serving.  However and whenever you decide to make it, you are sure to reap the nutritional benefits of delicious spring produce without a pill!

Springtime Celebration Salad with Walnut Vinaigrette, 

Featuring: asparagus, strawberries, spring mix, and spinach

Make 2 large meal sized salads or 4 small dinner salads.

Ingredients for dressing:

½ cup water

½ cup balsamic vinegar

¼ cup chopped walnuts

¼ cup raisins or chopped dates

1 clove garlic or 1 teaspoon garlic powder

1 teaspoon dijon mustard

¼ teaspoon dried oregano (optional)

Salt and pepper to taste

Ingredients for salad:

10 asparagus spears, roughly cut

10 strawberries, sliced (can substitute chopped apple, blueberries, red grapes, or mandarin orange slices if preferred)

4 tablespoons chopped red onion

6 cups spring greens (I used 50/50 blend of spring mix and spinach)

½ cup (or more, depending on preference) shelled edamame beans, called mukimame or thawed frozen peas

½ cup shredded carrots (optional)

½ cup sliced celery (optional)

2-4 tablespoons raw sunflower seeds (or other favorite nut/seed)

½-1 cup feta or goat cheese (omit if vegan)

Directions for salad dressing:

Combine all ingredients in a high powered blender and blend approximately one minute or until smooth.

Store in a container until needed.  Will keep in the refrigerator for two or more weeks.

Directions for salad:

Set out shelled edamame (mukimame) beans or peas to thaw

Cut ends of asparagus, rinse, and then rough cut remaining. Lightly steam asparagus on a covered microwave dish, approximately 30-50 seconds.  (You want them bright green and crisp.)

Rinse and slice strawberries, set aside.

Chop red onion, set aside.

Arrange greens in a large salad bowl, adding in carrots and celery if using.

Top with asparagus, strawberries, and edamame or peas.

Sprinkle with chopped red onion, sunflower seeds (or nuts), and cheese, if using.

Drizzle with desired amount of dressing and serve.

Serve with whole grain baguette slices or whole grain crackers, if desired.

Cranberry Smoothie: Say “Cheers” to your health

“Packed with antioxidants, this fruit can help keep your teeth, heart, and gut healthy.”clevelandclinic.org

What a Saucy Idea💡

Over Thanksgiving week, I purchased fresh cranberries with the intention of cooking up some homemade cranberry sauce.  However, I never got around to making it, and I wondered if I could, instead, add them to a smoothie.  Turns out, not only could I add them to my morning smoothie, but by adding them, I could amp up my own nutrition! 

Okay, so I tried to eat them raw, and they are really tart, like suck-the-saliva-out-of-my-mouth-tart! Nonetheless, I wasn’t deterred, especially once I read numerous current articles about all their healthful benefits. In fact, cranberries are often classified as a superfood due to their high nutritional value and antioxidants properties. 

Are Cranberries a Berry?🍓🫐

Cranberries are related to blueberries, but grow on vine-like plants similar to strawberries. Like blueberries, cranberries, by definition, are not true berries.  Instead, they are what scientists call a “false berry” because their fruits grow below the flower.  Nonetheless, it appears that the food industry still tends to classify cranberries (and blueberries) in the same categories as other berries.  As a group, according to nutritionfacts.org, berries “average ten times more antioxidants than any other fruit or vegetable.” Specifically, cranberries have “the highest fresh weight concentration of polyphenols (a strong antioxidant that complements and adds to the function of antioxidants) among commonly consumed fruit in the U.S.,” according to The National Library of Medicine.

This concentration of polyphenols may be why cranberries possess beneficial properties unique to them.  Research  has shown that cranberries lower the risk of urinary tract infections (UTIs).  This may be due to their high levels of proanthocyanidins (PACs), which prevents certain types of bacteria from sticking to the walls of the urinary tract.  These same PACs may protect against a type of bacteria that causes tooth decay. Additionally, cranberries have been linked to reducing risk for certain types of cancer.  They are also known to boost the immune system, reduce inflammation, and improve blood pressure.  

Given these facts, it is clear to see why cranberries should be incorporated as part of a healthy diet.  This brings me full circle to my motivation for now incorporating them as part of the regular rotation of a variety of whole food ingredients I incorporate into my daily smoothies.  When using cranberries, I have learned to blend their tangy taste with other flavor profiles to round out their taste and also gain the most nutritional bang for the buck.   

Sippin’ up the goodness🥤

Below is a recipe I now blend up repeatedly as part of my weekly smoothie rotation–usually twice per week. It incorporates other berries too since, as a whole, berries are a solid nutritional choice.  My recipe  also incorporates the creamier and sweeter tastes of mango and banana–both of which are nutritious in their own right. I also like to add vanilla protein powder to not only round out the flavor, but to also boost my protein intake–an important consideration at my age. There are further ingredients–mostly spices–that I use for their unique and beneficial properties, but they are optional as they don’t enhance or detract from the overall taste.

Remember, most nutritionists encourage us to eat the rainbow when it comes to fruits and vegetables. Cranberries, with their dark red color, can definitely be one of those colorful choices.  Furthermore, smoothies are one easy way to contribute to your overall daily intake of that rainbow-array of fruits and vegetables as part of a well-rounded diet.  They can be made ahead of time, if desired, and refrigerated for up to three days, or frozen in tightly sealed containers for up to three months.

Manifest Good Health✨

Smoothies, like this one, are my own private health manifestation.  While I know they are not the end-all, be-all when it comes to nutrition, I do know the whole food, plant based ingredients that I put in mine are high in quality nutrition and not full of artificial ingredients or sweeteners.  They are also full of fiber to keep the digestive system operating, well, “smoothly.” Plus, they are an easy way to get a serving of both vegetables and fruit in one tasty, fell swoop.  

From my home to yours, I toast my smoothie glass to yours and wish you much health and happiness this holiday season. 

Drinking up the goodness!

The Recipe📝

Cranberry Smoothie

1 cup frozen riced cauliflower (You won’t taste it!)

1 cup frozen strawberry, mango, blueberry mix (or any other berry mix)

1 whole banana, can be frozen

½ fresh cranberries

1 whole medjool date, or other natural sweetener 

½ teaspoon cinnamon

2 scoops vanilla protein powder

2 cups water

Optional anti-inflammatory and immunity add-ins:

2 teaspoons black elderberry syrup

½  teaspoon ground ginger

½  teaspoon ground turmeric

⅛  teaspoon black pepper (only if adding tumeric)

Put everything in a high powered blender in the order listed.

Blend for one minute.

Serves 2

Aunt Patty’s overflowing-with-goodness pound cake

Pound cake is so named because its original recipe called for a pound of each of its four ingredients: sugar, eggs, flour, and butter.”–Britannica 

Pounds of Appreciation 👩‍🏫

When I was a very young child, my mom would bake pound cakes for my siblings’ and my elementary teachers during the holidays.  I honestly do not remember for how long she kept this tradition going, since there were four of us kids.  What I do recall is carrying the cake into my classroom with great pride.  It was a family favorite recipe, so I felt like I was giving a grand prize to my teachers–a whole cake. 

sweet tooth cravings 🦷

As a young adult, I asked my mom for the recipe, which is when I discovered it came from my Aunt Patty, my mom’s oldest brother’s wife.  It was one of those recipes I made a couple of times before it became relegated to my recipe basket filled with index cards of recipes seldom used.  However, strangely enough this summer, I got a hankering for pound cake, and I dug out the recipe.

As soon as I read it, I realized that the recipe was back when I was ignorant to my celiac diagnosis.  Now I know why my stomach hurt every time I ate it!  I decided to try to create a gluten-free version of it.  It was NOT easy.

overflowing with love 🥮

My first adaptation overflowed into the oven.  It was a mess!  The good news was that the remaining batter that fully baked in the pan tasted good, so I was on the right track.  After spending a good hour, and then some, cleaning the oven, I was back to the drawing board.

I did more research and visited three sites for whom I have found reliable baking information in the past.  These sites helped with adapting the ingredient amounts of Aunt Patty’s original recipe to a gluten-free version. Mama Know Gluten Free confirmed my addition of vinegar to the original recipe.  King Arthur’s website inspired the idea of making the cake more decadent by adding a glaze to the top.  Finally, Land O Lakes helped me get clear on the correct cake pan size. 

The taste of sweet success 🍰

Cool on a rack first

Once success was attained, I knew I had to channel my former inner-child and share this gluten-free variation of Aunt Patty’s pound cake recipe. I’ve noted several adaptations/modifications that anyone can choose to bake a pound cake that meets dietary needs and/or taste preferences.  My mom often baked hers with cocoa powder, but for my gluten-free variation, I have not yet tried it, but I do plan to try that in the near future.

The gift of homemade goodness 👩‍🍳

Drizzle with glaze if desired.

In the meantime, as the holiday season is now upon us, give yourself, or someone special, the gift of decadent simplicity that can result when you mix and bake flour, eggs, sugar, butter, and few other simple ingredients!  From my home to yours, I wish a healthy and happy holiday season filled with “overflowing” homemade goodness from the kitchen!

Pounds of Saucy Goodness 🍯

Drizzling with good taste

Serve it up! 🥮

Add some extra sauce, like this strawberry sauce.

Aunt Patty’s Pound Cake, with optional Brown Butter Glaze

gluten-free and plant-based variations included

 Ingredients

1 cup milk, or non-dairy alternative

1 tablespoon vinegar

2 sticks (1 cup) room temperature butter, or non-dairy alternative

½ cup shortening

1 ½  cups sugar 

½ cup brown sugar

5 eggs, room temperature, or egg-free replacement 

3 cups of all purpose flour, or gluten-free alternative

(⅓ cup cocoa, optional if desiring a subtle chocolate flavor)

1 teaspoon baking powder

½ teaspoon baking soda

½ teaspoon salt

1 tsp almond extract

1 tsp coconut extract 

(Can replace almond and coconut extract with 2 teaspoons vanilla extract)

Brown Butter Glaze, optional

Ingredients

4 tablespoons butter, cut into small pieces

¼ cup brown sugar

¼ cup confectioner sugar

½  teaspoons pure vanilla extract

1-2 tablespoons milk

Directions

*Note:  It takes 3-5 hours for butter and eggs to come to room temperature

Preheat oven to 350 degrees

Prepare 12” (14.5 cups) bundt or 10” (16 cups) angel cake (tube) pan

Add vinegar to milk, and set aside in fridge 

Cream together butter, shortening, and sugar until light and fluffy

Add in eggs, one at a time mixing well between each addition

Gradually add in flour, baking powder, baking soda, salt, cocoa (if using) alternately with milk

Mix in extract(s), but do not overmix batter

Pour batter into cake pan

Bake approximately 1 hour or until toothpick inserted in the center comes out clean

Allow cake to cool in pan 15 minutes before turning onto cooling rack to completely cool

Serve as is or with desired toppings such as fruit or ice cream; or top with glaze (see below)

Directions to make glaze:

Place cut up butter in pan over medium heat

Continually stir butter until you begin to see brown bits

Remove from heat and whisk in brown sugar until incorporated

Whisk in confectioner sugar and vanilla extract

Gradually whisk in milk, 1 tablespoon at a time, until glaze is smooth and sugar fully dissolves

Poke hole with toothpick in cracks and crevices of cake top, and drizzle glaze over top of cake.

Store cake at room temperature in an airtight container for 3-4 days.

Can also freeze for up to 6 months.

Each loaf makes approximately 10 slices

*Pound cake is great toasted in a skillet or oven with butter and sprinkled with brown sugar, cinnamon, and sugar.

*It is also excellent served warm with favorite toppings such as berries, cherries, sauces, whipped cream, and/or ice cream. 

Toast it up in oven with butter, Brown Sugar, and cinnamon

Double Dark Chocolate Muffins

with gluten free and vegan options

“All you need is love.  But a little chocolate now and then doesn’t hurt.”–Charles M. Schulz

Photo by Pixabay on Pexels.com

Dark Chocolate Love 🍫❤️

My love for dark chocolate is no secret.  Even as a kid, on the rare occasion, typically around Christmas, when those Hershey miniature chocolates were given as part of Christmas presents, I would trade my milk chocolate for the special dark bar.  Now, I know that bar is only made of about 45% dark chocolate, but at the time, it was the darkest chocolate for which I was aware.  

Back then, I didn’t eat dark chocolate because it was good for me–who knew in the 70s?  I just liked that bittersweet taste.  Plus, we rarely had candy as a kid, so eating a Hershey’s bar, even the miniature kind, was a real treat.  

As an adult, I still like the bittersweet taste of dark chocolate, but I had to learn to develop a healthy relationship with food, especially chocolate, and it wasn’t always easy.  Who doesn’t love good food, especially tasty sweets?  Over the decades, however, I have decided what our grandparents taught us was right all along.  Eat your fruits and vegetables first, but always save a little space for a sweet treat!

Make a batch and share the chocolate joy!

I don’t bake desserts weekly like my grandmother used to do, but I do enjoy baking when my time allows.  And, if I am baking something with dark chocolate in it, well, that’s all the more fun.

  My sister-in-law, Jacki, recently sent me a recipe she found in a Woman’s World magazine which is very similar to a variation I found on the website, It Doesn’t Taste Like Chicken. My recipe adaptation, listed below, is a hybrid of the two recipes based upon my own personal dietary needs as I have to eat gluten-free due to celiac disease, but I also choose to eat plant-based.  Therefore, feel free to adjust and tweak ingredients based upon your family’s preferences.

While I recognize, this recipe probably isn’t the most healthy choice for everyday, it does offer several benefits, making it a justifiable splurge.  First, there is oat flour, which is full of fiber, protein, vitamins, and nutrients, and it can help lower cholesterol.  Secondly, there is both cacao powder–an unprocessed version for cocoa powder, but you can always use cocoa powder–and dark chocolate chips, both of which contain magnesium, antioxidants, and flavonols.. The antioxidants can help lower cholesterol, and the flavonols offer numerous benefits such as supporting heart health, balancing the immune system, and boosting brain function to name a few of the benefits.  

Double the chocolate; double your pleasure!

Flexible and Adaptable REcipe 💜

Lastly, I forgo eggs and oil in baking when possible due to the fact that fats cause me reflux issues–and that’s no fun!  The cider vinegar makes a great egg replacement and helps the muffins rise.  Plus, you won’t even taste it once baked!  While the apple sauce retains the muffins’ moisture content without adding saturated fat.  

Even with all of these adaptations, please do not think I am saying this is an ultra-healthy breakfast recipe because oatmeal with fresh fruit, or avocado on whole grain toast, are probably healthier choices.  However, for a special weekend or holiday treat, or even as a dessert, these muffins are full of a rich chocolatey flavor and texture that is oh-so-yummy!  Serve them warm and drizzle your favorite topping over them or eat them plain.  These muffins freeze well–for up to three months in an airtight container–for future weekend treats, so you can be sure none of your muffins go to waste. 

From my home to yours, as always, I wish you (mostly) healthy, happy, and homemade fun!  Let me know what you think of these!

Make a batch and share the chocolate joy! 💖

Double Dark Chocolate Muffins

Ingredients:

1 ¼ cup oat flour (Can substitute all-purpose flour or gluten-free all purpose flour)

¾ sugar

½ cup cacao or cocoa powder 

2 teaspoons baking powder

1 teaspoon instant espresso powder, optional

½ teaspoon salt

1 cup favorite milk (I use plant-based)

½ cup applesauce (Can use equal amount of oil, if preferred)

2 tablespoons almond or peanut butter, melted 

1 tablespoon apple cider vinegar

¾ + ¼  cup dark chocolate chips (I used plant-based and gluten-free version)

Directions:

Preheat oven to 400 degrees

Line 12 muffin tins with cupcake cups

In large bowl, whisk together flour, sugar, cacao powder, baking powder, and salt

Melt peanut butter in microwave for 20-30 seconds

Fold in milk, applesauce, peanut butter, and vinegar

Stir in ¾ cup chocolate chips

Divide batter evenly among cups

Top cupcakes with remaining chocolate chips (I like to use mini chocolate chips on top.)

Bake 18-22 minutes or until toothpick inserted in center comes out clean

Allow to cool 10 or so minutes before serving

Makes 12 muffins which can be stored at cool room temperature for up to three days, or frozen in an airtight container for quick reheated treats

Feel free to dunk!

Sweet Summer Strawberry Cake

“Every cake has a story to tell.”–unknown

Sweet treat, strawberry cake

Family traditions🧑‍🍳

When I married into my husband’s family some thirty years ago, it was the merging of two families who enjoyed cooking, tried-and-true recipes, handed down from one generation to the next, typically accompanied by a story or two.  On my husband’s side, there were several excellent cooks, especially his mother, his sister, and her husband.  Whereas, in my own extended family, I grew up around three women–my grandmother, my mamaw, and my mom–who were great cooks in their own right.  Therefore, between the two families, there was a wealth of inspiration, ideas, and sources for recipes.  

To this day, many of those family recipes remain favorites.  However, since being diagnosed with celiac disease over ten years ago, I have been on a culinary quest to adapt many of those beloved recipes so that I can, forgive the pun, “have my cake and eat it too”! 

When I first saw my mother-in-law’s version of this recipe, I could help but notice the how thick and creamy the icing looked.

But First . . .🍰

The original Strawberry Cake recipe came from my mother-in-law, Colleen.  She and my grandmother were very similar when it came to their approach to cooking.  They both believed in the right to serve large portions, and both embraced the notion of going their own way instead of following recipes, step-by-step.  Therefore, when my grandmother, or Colleen, would share a written recipe, there was sure to be additional verbal directions and advice for best preparing the recipe.

Dressing it up with sprinkles and blueberries if desired.

Never shy away from making a recipe your own🥣

It is that familial cooking spirit of never shying away from the right to make a recipe uniquely your own that continues to inspire me. Gluten-free baking wasn’t a “thing” when Grandmother and Colleen were living, so if I want to still enjoy those cooking stories from my past, I have to forge my own cooking path.  Nonetheless, I think they would have enjoyed many of my modified recipes, including this one. 

Add some pomegranate arils, for a bit more color contrast!

The eyes have it first👀

I recall the first time I ate this cake at Colleen’s house.  It was a Sunday family dinner, and I immediately noticed this beautiful, thickly frosted pink cake.  Now, my grandmother taught, “Your eyes eat things before your mouth,” and from the first look at that cake until the last bite, my eyes and mouth were in agreement: the cake was every bit the tasty confection it looked to be.  

The icing is thick and rich

Make it Gluten-free if you want🥮

I am not sure if my recipe adaptation is on-par with Colleen’s, but I do know that my own family loved it.  In fact, my adult daughter, one who typically, and quickly, discerns if I have made something gluten-free, asked if the cake was really gluten-free because she could not taste the difference.  Even more telling was the fact that she told me she thought that it was my best gluten-free recipe to date, and I could “bake it for her anytime.”  

Homemade strawberry reduction takes a bit more time, but it is so worth the effort! And, the leftovers of this reduction can used as you would any other fruit sauce or jelly.

Strawberry Reduction🍓

In addition to making the recipe gluten-free, I eliminated strawberry gelatin as a main ingredient, and instead, I made a strawberry reduction with double the amount of strawberries the original recipe called for.  My variation is also dairy-free, as I used non-dairy milk and butter; however, I did use real eggs.  That said, if you need this recipe to be egg-free, there are plenty of egg-replacement products available.  

The cake is light and spongy.

Cupcake Crazy?🧁

I’ve included directions for baking cupcakes and several cake variations, so the recipe can be baked and assembled in a variety ways.  Additionally, any leftover strawberry reduction tastes terrific spread over toast, stirred into oatmeal, or added to a smoothie.  

From my Family to Yours🏠

From my home to yours, I hope this recipe allows you to create your own cake story and recipe lineage.  Who knows, maybe one day, your grandkids will make their own version of Strawberry Cake! 

Any way you slice it up, this strawberry cake is sure to please!

Strawberry Cake (or Cupcakes) 🍰

Ingredients

½  cup milk (plant-based, if desired)

2 teaspoons white or apple cider vinegar

1 package white or yellow cake mix (gluten free, if needed)

3 tablespoons all purpose flour (gluten free, if needed)

3 eggs or equivalent egg-replacement

⅓ cup oil, melted butter, or applesauce

½ water

1 teaspoon pure vanilla extract

1 ½ cup strawberry reduction, completely cooled (see below)

*Strawberry Reduction

Ingredients

2 pounds fresh or frozen strawberries (If frozen, be sure to thaw for at least 20 minutes)

4 tablespoons sugar

1 tablespoon lemon juice

Strawberry Buttercream Frosting

Ingredients

1 stick butter, softened (plant-based, if desired)

¼-½ cup strawberry reduction, depending upon how much flavor you want

1 teaspoon vanilla extract

⅛ teaspoon salt

4-6 cups confectioners sugar

Up to 4 tablespoons milk, if needed for creaminess

Directions

*Make Strawberry Reduction 12-24 hours+ in advance

Thaw and/or remove stems from strawberries, then cut in half

Puree strawberries, sugar, and lemon juice in food processor or blender

Pour into medium saucepan and bring to low boil over medium heat

Reduce heat, but continue to simmer over low heat for 30 or so minutes, stirring occasionally

Allow strawberries to reduce to texture similar to that of tomato sauce

Allow to cool, then store in an airtight container in the refrigerator until completely cooled and/or ready to use.

Make Cake or cupcakes

Add vinegar to milk, set in fridge for five minutes (making “buttermilk”)

Meanwhile, preheat oven to 350 degrees

Coat cake pan(s) with nonstick cooking spray or line muffin tins with parchment paper

In a large mixing bowl, stir together cake mix and flour

Beat in eggs, one at a time.

Then, stir in “buttermilk,” water, oil (or butter or applesauce), and vanilla extract.

Next, fold in strawberry reduction, scraping down the sides as needed

For cupcakes:  divide batter among cupcakes, using a greased ice cream scoop, if desired, filling cup ½ – ⅔  full

For cake:  pour batter into one 9 x 13 cake pan, a 10-cup bundt pan, or divide between two 8” or 9” inch round pans

Baking time:  Cupcakes = 20-25 minutes; 9 x 13 pan = 30-35 minutes; Bundt pan = 45-48 minutes; Two round pans = 30-35 minutes or until toothpick inserted in center comes out clean

Allow cake or cupcakes to cool completely before frosting (I even put mine in the refrigerator for a couple of hours before frosting.)

Make the Frosting

In a large bowl, cream butter, strawberry reduction, vanilla extract and salt

Add in confectioner sugar, one cup at a time, until icing is firm

Then, add in milk, one tablespoon at a time, whipping in between each addition until desired consistency is reached.

Pipe or spread over cake or cupcakes.

Decorate tops of cake or cupcakes with red, white, or pink sugar sprinkles or freshly sliced strawberries

Store in airtight container and refrigerate

Makes 24 cupcakes or 1 cake of your choosing

Spinach-Artichoke Dip with plant-based and gluten-free options

“Popeye was right about spinach: dark green, leafy vegetables are the healthiest food on the planet. As whole foods go, they offer the most nutrition per calorie.”–Michael Gregor

“You’re not going to believe what I ate, Mom!”

I was talking with my daughter, Madelyn, on the phone.  She is attending graduate school, and she was describing a dinner that a friend had prepared for one evening during a break from her studies.  

“Spinach and artichoke dip!  Not only that, Mom, but it was vegan, and it was surprisingly good . . . and you know how funny I am about texture and taste.”

Maddie went on to insist that I would have to make this dip when she was home for the holidays.  In fact, she had already asked her friend to share the recipe with her, so she could send it to me.  She went on to explain how her friend has lupus, and eats an anti-inflammatory diet that focuses heavily on fruits, vegetables, nuts, seeds, and a few select whole grains in order to reduce her inflammation.  

As I listened to her continue to describe the dip, my mind was already thinking about the ways I could adapt the recipe.  I was eager to, ahem, dip into reading various plant forward recipes and techniques in order to create my own version.  Not only did I want to make the dip in honor of my daughter’s request, but also because the dip is largely made up of two of my favorite vegetables: spinach and artichokes.

Photo by Jacqueline Howell on Pexels.com

Maddie’s friend was on to something.  Both artichokes and spinach are highly anti-inflammatory.  Spinach, specifically, is chock full of vitamins, such as A, K and C, and it also contains folate, magnesium, iron, potassium, calcium, and small amounts of other B vitamins. It is high in fiber and low in calories.  Spinach is also high in antioxidants, supports brain and eye health, has been shown to protect against certain diseases, and helps to lower blood pressure when regularly consumed.  

Photo by Andie on Pexels.com

Artichokes are no joke either. They, too, are full of vitamins, including folate, magnesium, manganese, potassium, as well as vitamins K and C.  Like spinach, artichokes are high in fiber, full of antioxidants, and have been shown, when consumed daily, to help regulate blood pressure. Additionally, artichokes promote liver health and are a unique source of prebiotics, which are beneficial gut bacteria that can boost immunity, assist in digestion, and benefit mood.

Of course, I can share all the benefits of these two nutritional, anti-inflammatory powerhouses, but let’s be honest, for most people, myself included, it’s all about the taste. Does this dip taste good, in addition to being made with beneficial ingredients?  Is it worthy of being shared with others?   

I had my favorite taste tasters, and pickiest eaters, Maddie, and my husband, John, taste the dip, and miracle of all miracles, they both liked it!  Maddie, the pickiest of the two, said she loved it just as I made it.  Her only wish was that we had baguette crackers like her friend served it with.  John, typically not as picky, filled up and ate a big soup bowl worth of dip; however, he added both parmesan and mozzarella cheese to his bowl because he, “wouldn’t want to eat too healthy over the holidays!”  Meanwhile, I served up the dip on a plain baked potato for my dinner, and let me just say that was one tasty dish!

Whether you make it with, or without dairy, you’re still packing a healthy punch of powerful, propitious plants. Serve it up for your next favorite gathering and watch it disappear.  No one ever has to know the dip benefits their health too! 

From my home to yours, may you have a prosperous and healthy 2023.

Spinach Artichoke Dip

Plant-based with dairy-free and gluten-free options

Ingredients

1 cup (raw) cashews, soaked overnight or at least 4+ hours

1 ¼  cup Greek or plant-based Greek yogurt (can substitute with mayonnaise)

¼ cup water

12-16 ounces (1 package) frozen spinach, thawed and drained

1 14 ounce can artichokes, drained and chopped

⅓ cup finely chopped onion

2 teaspoons minced garlic

1 tablespoon freshly squeezed lemon

1 teaspoon braggs liquid aminos (or soy sauce, if don’t need gluten free)

 ½ teaspoon salt, or to taste

½ teaspoon onion powder

½ teaspoon pepper

Optional additions: Mix in up to 4 ounces or ½  cup of any of the following ingredients:

cream cheese (or vegan variation), parmesan/romano/pecorino cheese, soft goat cheese, and/or mozzarella cheese, if desired

Directions

Preheat oven to 400 degrees

Coat a small casserole dish with cooking spray (2 quart size).

In a food processor or high speed blender, blend cashews, yogurt and water until creamy, about 1-2 minutes.

Add cashew mixture to a large mixing bowl and stir in the rest of the ingredients.

Spread dip evenly in the casserole dish.

*Bake 20-30 minutes, or until top turns golden brown

Serve warm with veggies, tortilla chips, crackers, smear over your favorite toasted bread, or even a baked potato.

Store leftovers in an airtight container and refrigerate.

Serve warm with crackers, tortilla chips, or baguette chips

*Serves 6-10 as appetizer

Get into the holiday baking mood with Banana Strawberry Bread with optional chocolate chips–with gluten-free and vegan options

“As long as you know how to bake, life is sure to be sweet!”–Unknown

One Sunday afternoon this past summer, I was talking with my Dad via phone as he now lives in Florida.  He shared that after church service, a fellow worshiper shared slices of homemade strawberry bread with others.  Listening to Dad, I decided to add “strawberry bread” to my list of writing/cooking ideas.  Of course, Dad was not surprised.

It took some trial and error, but I think I found the sweet spot.  Of course, when I bake, I am trying to meet unique dietary needs.  Selfishly, I prefer baking recipes that have the ability to be gluten free due to my celiac disease; however, I also like to find versatile ingredient scaffolding for those that can safely consume wheat.  Furthermore, I choose to eat plant-based; therefore, I also like to play with ingredients that offer that option as well.  Bottom line, however, if it tastes good and is easy to make, most people don’t care if it’s gluten-free and/or plant-based. 

Photo by solod_sha on Pexels.com

The recipe all came together after picking up a grocery order one day only to discover I was given extremely ripe, fully brown bananas instead of bright yellow.  Once I saw those bananas, I knew how I wanted to create my own version of strawberry bread.  I took further inspiration from The Big Man’s World website.  

Strawberries and bananas are complementary and commonly paired in many food items, such as drink mixes, smoothies, yogurts, fruit-cups, and so forth.  Additionally, bananas are one way to bake without eggs to bind ingredients together into a batter with a creamy texture and balanced moisture composition.  Furthermore, bananas add a subtle sweetness to baking recipes that tends to compliment many ingredients.  

Photo by Kimona on Pexels.com

When baking without eggs, I also add a tablespoon of vinegar.  This depression era egg replacement reacts with the baking soda to create carbon dioxide that helps baked goods rise as they bake.  Plus, vinegar overall improves bread texture, whether baking with or without eggs.

You may notice that I use date sugar in this recipe, although it can be replaced with your preferred form of sugar. Date sugar is considered less processed due to the fact that it is made from dried dates pulverized into a powder; therefore, it retains much of its fiber and nutrients.  That said, don’t be fooled, it is still sugar, and like any sweetener, it should be consumed in moderation.

If you like to bake for the holiday season, this bread will lend itself to potluck gatherings, as it can be made a day or two ahead of time.  It would also make a nice holiday gift or simply a fun weekend addition to brunch.  It stores well, becoming more moist with age. I have toasted leftover slices of it in my air-fryer and reheated it in the microwave–either way works.  Plus, you can substitute your favorite chopped nuts in lieu of the chocolate chips–I just happen to like chocolate!  It’s tasty plain or smeared with butter or cream cheese as my daughter and husband  do or with your favorite nut butter, as I like to do.

This recipe is versatile, using fresh or frozen fruit. (Hint: I save all over-ripe bananas–and even strawberries–in a freezer bag in my freezer and pull out what I need anytime I’m baking!) Notice all the ways I offer substitutions for the original ingredients I used, so that you can meet your own individual needs/taste preferences.  Sprinkle the top of the batter with crystallized or festive-colored sugar before baking if desired and find ways to make this recipe your own!

From my home to yours, here’s to holiday baking!

Banana Strawberry Bread with optional chocolate chips

 with gluten free and vegan options

Ingredients

2 cups oat flour, can replace with all-purpose or gluten free flour

1/2 cup date sugar, can replace with regular or brown sugar

¾ teaspoon baking soda

¼ teaspoon salt

1 ½ cup mashed banana (about 2 bananas)

1/4 cup applesauce, can replace with oil or melted butter

1 teaspoon vanilla extract

¼ cup milk, dairy or non-dairy work

1 tablespoon apple cider vinegar

½ + ¼  cup + sliced strawberries, frozen or fresh

¼  cup + 1 tablespoon chocolate chips, gluten free and/or vegan; 

(can replace chocolate chips with chopped nuts)

Directions

Preheat oven to 350 degrees

Prepare loaf by spraying with nonstick cooking spray

Mash banana and set aside

In a large mixing bowl, stir together dry ingredients

Make a well in the center of the dry ingredients

Stir in remaining ingredients, including banana, into the dry EXCEPT for strawberries and chocolate chips

Fold in ½ cup of sliced strawberries and ¼ cup of chocolate chips

Pour batter into loaf pan

Top with remaining strawberries and chocolate chips

Bake for 50-70 minutes or until a toothpick inserted in the center comes out clean

Cool in pan for 10 or so minutes, use spatula to gently lift out of the loaf pan.

Finish cooling on wire rack

Slice to serve.

Can be kept in an airtight container, once completely cooled, in the fridge for up to five days.

Can also be stored in a ziplock freezer bag and frozen for up to 3 months.

In a large bowl stir together dry ingredients and make a well in the center. Then set aside.
In a medium bowl, stir together wet ingredients.
Pour wet ingredients into the center of dry ingredients and mix with spoon until blended.
Finally, stir in sliced (or chopped, if preferred) strawberries and chocolate chips or nuts.
Bake in oven, and allow it to cool in pan at least 10 minutes before using a spatula to gently lift out loaf. Set loaf on cooling rack, and allow it to continue to cool.
Slice it up and eat it plain or with your favorite toppings, such as maple syrup, honey, nut butter, butter, or cream cheese to name a few.
Personally, I love nut butter smeared on a heated slice and allow the warmth of the bread to melt it.

Gluten-free, Chocolate Donuts with Glaze: make your house smell like a bakery outlet

And the donut stood there with a glazed expression.–Unknown

Honestly, I am not what I would call a “donut” person.  Even before I knew I had celiac disease, I never, per se, craved donuts.  However, when I was quite young, my grandparents would occasionally drive about an hour away from their home to a Dolly Madison bakery outlet.  They would buy treats that would normally never be in my own childhood home.  Oatmeal cream pies, twinkies, fruit pies, zingers, and bags of donut gems. I can recall the childlike appeal of those colorful, catchy items on my grandparents’ kitchen table.

I never really understood why they made this trip because my grandmother was an excellent cook and an exceptionally tasty baker of desserts.  Up until the day my grandfather went to a nursing home, it seemed as if Grandmother always had some freshly baked dessert on-hand.  Maybe they made this trip because they came of age during the depression and never had much during those lean years.  Then again, it could have had more to do with the fact that they had once owned and operated a grocery store and simply enjoyed having packaged products. 

Photo by Henri Mathieu-Saint-Laurent on Pexels.com

Regardless of the reason, the grandkids were often able to reap the benefits of these bakery outlet trips.  While we were certainly limited in the amount of sweets we were permitted to eat, my grandparents were always more lenient.  In particular, I fondly recall those donut gems that came in the white bag with a cellophane center allowing purchasers to see those orbs of processed confectionery–ready to spike blood sugar levels of consumers far and wide, especially the small bodies of children.  

In the end, I am not sure if those memories have inspired my latest obsession with donut baking, but I do find baking these treats once per month to be a sweet, creative outlet in a world often filled with bitter headlines.  However, I do try to find ways to bake these donuts a bit more healthily–although let’s be honest, they’re still donuts.  Nonetheless, this recipe is gluten-free that can be made free from animal products, if desired, and it is less sugary than those rings of gems from that long ago bakery outlet. 

Why not set aside less than an hour of time to bake up a pleasant headline in your own home? They are easy to make and a cinch to glaze.  You don’t even have to own a donut pan. Most of all, your house will be smelling like a bakery outlet without the two-hour round trip drive! 

These donuts are ready to be eaten or glazed.

Gluten-Free Chocolate Donuts with optional Glaze

Donut Ingredients:

1 egg OR 1 tablespoon ground flaxseeds + 3 tablespoons water*

1¼  cup oat or all-purpose (gluten-free) flour**

⅓ cup dutched cocoa powder ***

⅓ cup sugar

1 teaspoon baking powder

½ teaspoon baking soda

¼ teaspoon salt

1 tablespoon vinegar

¾ cup milk

3 melted tablespoons of favorite nut-butter, butter, or applesauce****

1 teaspoon pure vanilla extract

Chocolate Glaze Ingredients:

½ cup gluten-free chocolate chips

1-2 tablespoons milk

2 teaspoons pure maple syrup

¼ teaspoon pure vanilla extract

Directions:

  • If using flaxseed, combine flaxseed + 3 tablespoons of water, set in the fridge to “gel” for 10-20 minutes.
  • Preheat the oven to 350 degrees.
  • Prepare a donut pan(s) with a light coating of nonstick cooking spray, OR if you do not have a donut pan, do the same with a muffin pan and plan on filling with batter ½ way full.
  • Combine dry ingredients until well blended.
  • Mix in the remainder of wet ingredients including flaxseed/egg with a large wooden spoon.
  • Divide batter among 8-10 donut spots of donut pan.
  • Bake for 10-15 minutes until a toothpick inserted comes out clean.
  • Allow to cool in the pan for 5 minutes before flipping onto the rack to cool 10-15 more minutes. Serve immediately or add glaze. Makes 8-10 donuts.
Look at this yummy glaze, ready for donut dipping.

To make glaze:

  •  Lightly spray a microwave-safe bowl with non-stick cooking spray.  
  • Add in chocolate chips and milk. Heat for 30-45 seconds until slightly melted.
  • Stir gently, and once well mixed, add in maple syrup and vanilla extract
  • While glaze is still warm, individually dip one side of each donut into glaze, and place back on the cooling rack to firm up. Repeat for each donut.  Feel free to add sprinkles, sparkling baking sugar, or shaved bits of chocolate for a more festive look. 

Recipe Notes:

*Choosing between the egg or flaxseed is personal preference, but it is worth noting that

  flaxseed is plant-based. 

**I have celiac disease, so I cannot bake with wheat-based flours.  However, if you do

 do not have a gluten allergy, feel free to use all-purpose flour instead.

***I prefer dutched cocoa powder over regular cocoa powder due to its mellow, smooth

 flavor that I find to be less bitter than regular cocoa powder.  Plus, it makes baked goods

 dark and rich looking.  However, IF using REGULAR cocoa powder, reduce baking

 powder to ½ teaspoon and baking soda to ¼ teaspoon.

****Nut-butters, including tahini, offer a richer flavor and consistency; whereas, butter offers a lighter flavor and can be dairy or plant-based.  Applesauce is a no-oil choice. 

Enjoy!!

Steph’s Key Lime Smoothie

“When life give you limes, rearrange the letters until they say smile.”–unknown

Photo by Taryn Elliott on Pexels.com

Would you believe that eating limes or adding lime slices to water is actually quite beneficial to your health?  Personally, I love the flavor of lime.  I like to squirt the juice of a slice or two of lime on salad, in salsa, in refried beans, veggie pad thai, and many other dishes.  Lime is so refreshingly tart and tangy.  It gives instant zip to whatever it’s added, including water, and, of course, margaritas! 

When purchasing a lime, according to several top chefs, it’s best to look for limes with a bit of give to them.  While limes should not be mushy, they should not be hard as that is an indication that they are not juicy.  Additionally, lime, like lemons, can be stored at room temperature for about one week if kept out of direct sunlight.  However, most cooking sites recommend that for long term storage up to four weeks, place limes–and lemons for that matter–in a plastic bag and keep in the crisper drawer of your refrigerator.

Photo by Cup of Couple on Pexels.com

Limes, like nearly all citrus fruits, offer numerous health benefits including high levels of antioxidants which protect the body from free radicals or chemicals that can cause the body harm at a cellular level.  Additionally, limes are a good source of vitamins and minerals including vitamins A, B, C, and D, as well as calcium and magnesium.  Even with all of this obvious goodness, consuming limes has other health implications worth considering.

The peel, pithe, and juice of a lime may boost heart health by slowing down the build-up of plaque on the walls of your arteries.  Limes are also a good source of potassium which has been shown to help maintain healthy blood pressure levels. The acid in lime juice is good for digestion by helping the saliva break down food as well as increase digestive secretions in the stomach. It is a natural weight loss supplement due to the fact that it slightly boosts metabolism–like all citrus fruits.  Furthermore, it enhances immune function–an important factor in the age of the COVID virus and all of its nasty variants.

Photo by LAVA on Pexels.com

“Lime juice makes things taste fresher.  I use it for drinks, salsas, relishes, soups, and sauces.”–Bobby Flay

If you have not tried adding lime to water, I strongly recommend this practice.  I also find limes especially tasty when added to lemon flavored sparkling water for added zing.  Slices of lime are also nice when added to a glass of iced green tea.  The zest of a lime is an excellent addition to plain yogurt, vanilla ice cream, white cake mix, sour cream, rice, smoothies, and mixed with a coarse salt to line the rim of a drink glass or sprinkle over your favorite dish.  Store a bowl of leftover peel in your refrigerator as an air freshener or grind it up in the garbage disposal to deodorize.  Limes, as you can see, are extremely versatile, useful, and are certainly worth keeping on hand year round.

Now, add all of that lime goodness to a whole-food, plant based smoothie, and you’ve got one nutritional bomb for a meal.  I absolutely believe drinking your calories is typically not advisable–especially with regards to sugar-laden drinks.  However, it is hard to beat the convenience and portability of smoothies.  That’s why, if you’re going to drink your breakfast, (or any other meal for that matter) why not make the drink yourself?  This allows you to control the ingredients and the portions of each to fit your specific dietary needs.  It won’t break your bank, and as an added bonus, smoothies can be made ahead and frozen for up to three months while still maintaining their freshness until ready to use. 

Add a slice of fresh lime to seltzer is a nice addition!

Finally, if you need further evidence of the benefits of a whole food, plant-based smoothie, including this Key Lime Smoothie, look no further than the reigning queen of nutrition for which most Americans are missing in their diet:  fiber! According to Harvard School of Public Health, “children and adults need 20 to 30 grams of fiber per day for good health, but most Americans get only about 15 grams a day.”  Fiber comes in two varieties, soluble and insoluble, and both are beneficial for staving off hunger, regulating blood sugar levels, and preventing health issues, including diabetes, heart disease, certain cancers, diverticulitis, and constipation–the bane of aging.  

What is the best way to meet your fiber needs? Eat a wide variety of whole, plant based foods, such as fruits, vegetables, legumes, nuts, seeds, and whole grains–which is exactly why this recipe is beneficial.  Of course, you can take a fiber supplement, but these are void of other essential nutrients that are found in whole foods, and they certainly don’t taste as scrumptious as a cool, creamy smoothie.  

Show your body a little TLC with a nutritious, fiber filled, whole food plant based smoothie!

Made as described below, you are consuming 18+ grams of fiber per serving and  9+ grams protein.  Plus, these ingredients provide an excellent source of potassium, calcium, iron, and other vitamins, including a full day’s supply of Vitamin C.  Even if you decide to divide this recipe into two portions, you are still starting the day full of fiber, nutrition, and protein–enough to power through your busy schedule!  

Take it from me, it is possible to give your body some extra nutritional love, no matter how busy your schedule, with make ahead, freeze until needed, whole-food, plant based smoothies!  From my home to yours, I wish you healthy, whole food nutrition!

No gut bombs here! Just whole food plant based goodness!

Steph’s Key Lime Smooth Smoothie

Ingredients:

1 ¼ cup favorite no sugar added vanilla milk (almond, soy, oat, etc)

¼ cup aloe vera

1 ½ cup frozen riced cauliflower (or a mix of your favorite greens such as kale, spinach, swiss chard)

1 rounded tablespoon of protein powder (make it vanilla for extra sweetness)

1 teaspoon vanilla extract or vanilla powder

1/2 inch fresh or 1/4 teaspoon ground ginger root 

Dash of salt

1-2 medjool date(s)

½  granny smith apple, destemmed and quartered

1 kiwi, peeled and quartered

1 lime, quartered (remove some skin, but leave most of pithe)

Optional: Add in 1 tablespoon ground flaxseeds, chia seeds, hemp heart, chopped walnuts for added nutrition

Directions:

Add milk, aloe vera, and riced cauliflower.

Blend those three ingredients until thoroughly blended.

Add in the rest of the ingredients in the order listed.

Blend until smooth.

Makes one extra large smoothie or two smaller smoothies.