Grapefruit Smoothie: Refreshingly, tasty nutrition on the go

“In 1993, Texas chose the red grapefruit as its state fruit. The red grapefruit was chosen because it was the first fruit ‘invented’ in Texas, and grapefruit trees have built more revenue than any other fruit tree in Texas!”–Wintersweetz.com 

Photo by Laker on Pexels.com

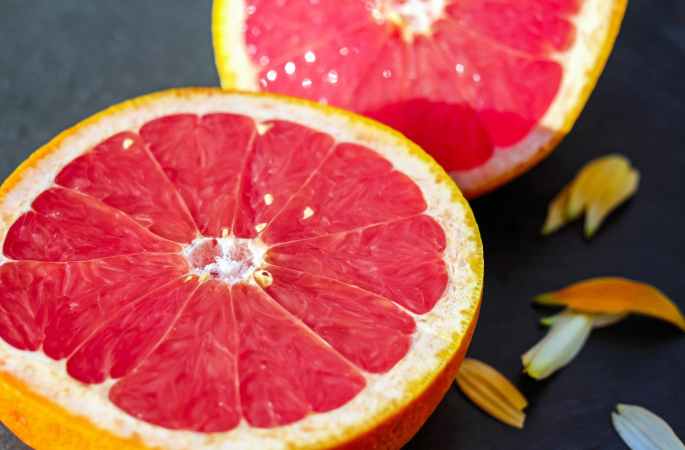
The forbidden Fruit🏝️

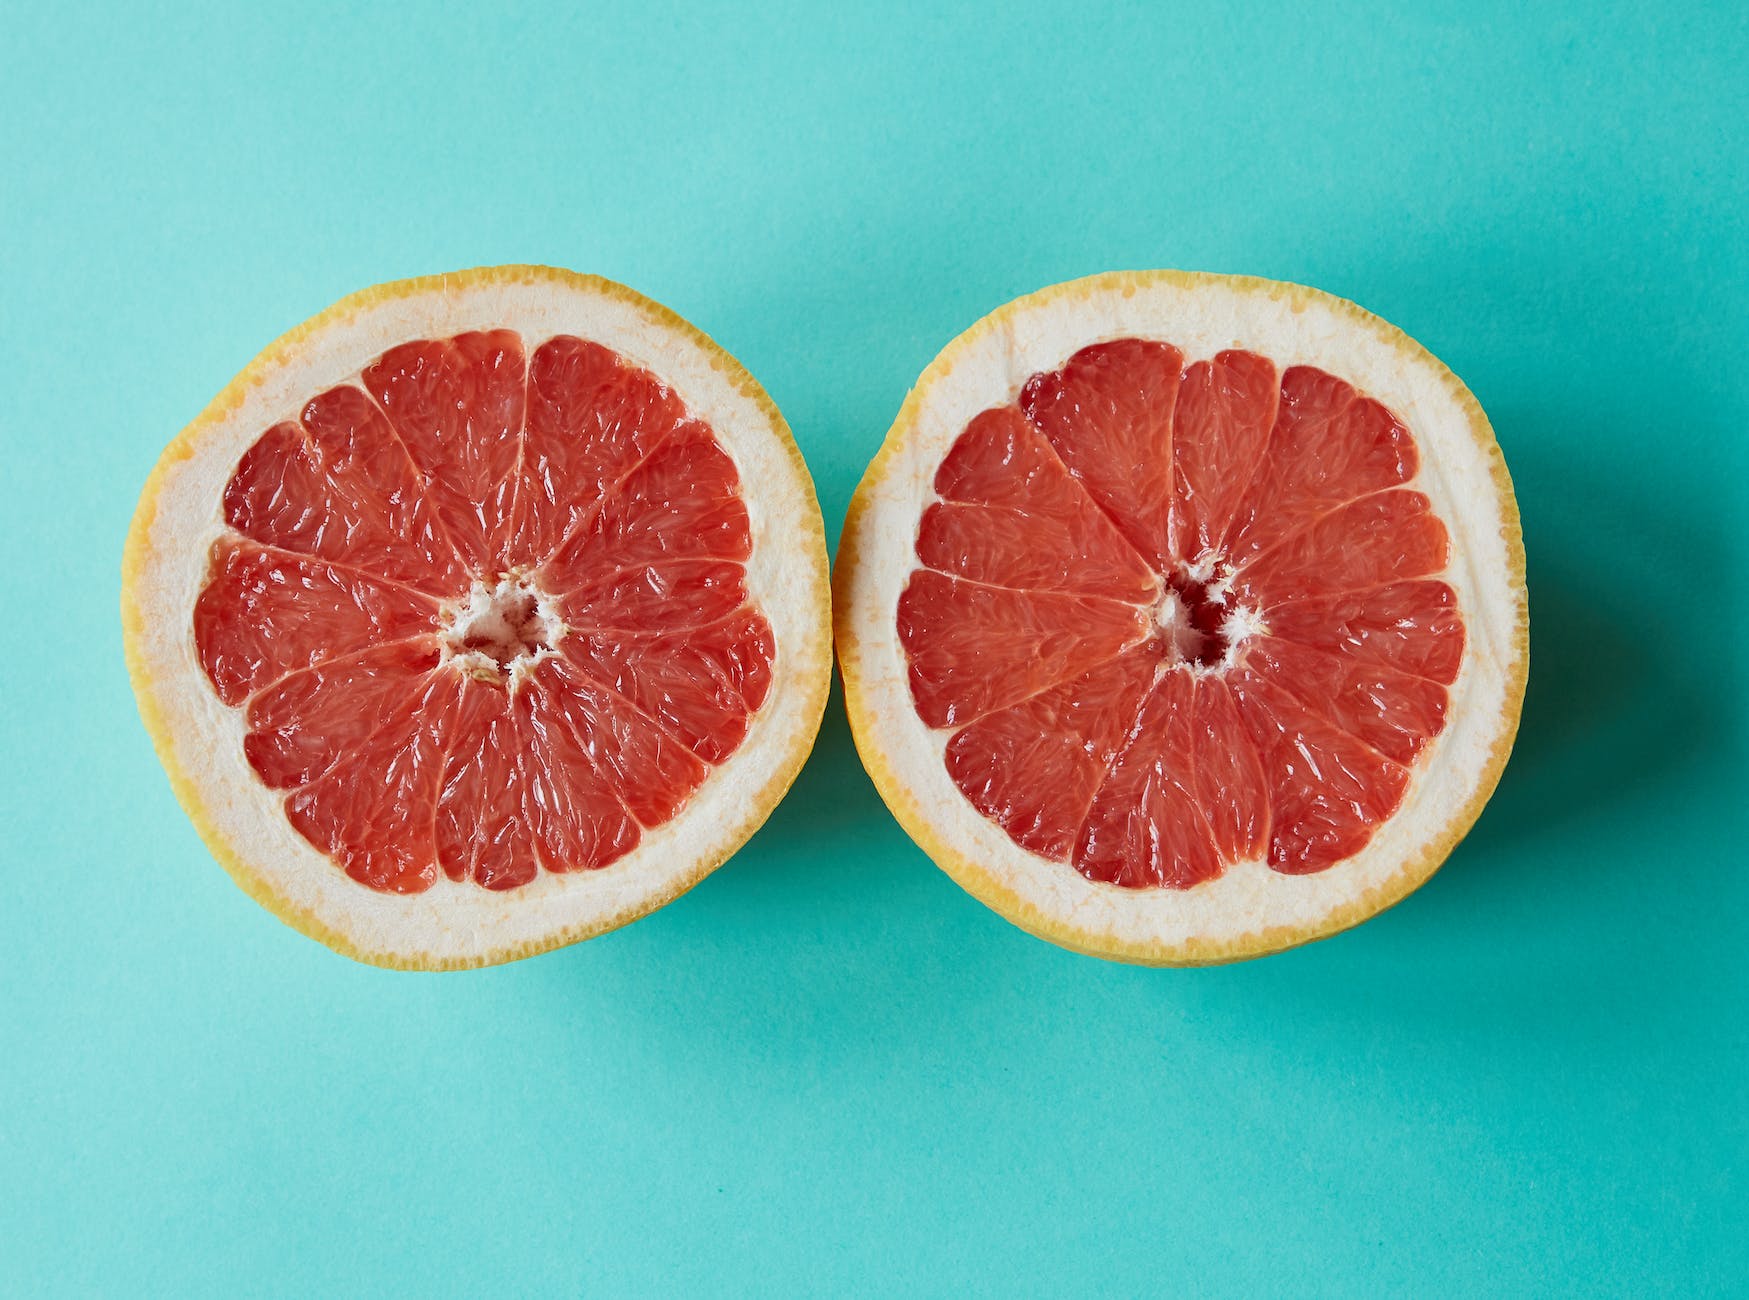
I was absolutely surprised to learn that the grapefruit was once named the “forbidden fruit” in the mid-1700s by a reverend searching for the identity of the original tree of good and evil from the Garden of Eden in the Caribbean Sea.  Years later, that same “forbidden fruit” tree was brought to Texas by Spanish missionaries in the late 1800s and given to local farmers in the southern area of the state.  Little did those Texas missionaries know that the Rio Grande Valley possessed fertile soil and subtropical weather, creating ideal growing conditions for grapefruits. Now, Texas is the third largest citrus producer in the United States, and it is especially known for its red varieties of grapefruits, such as Rio Star and Ruby Sweet. 

Personally, ruby red grapefruit is one of my favorite fruits.  I especially appreciate its sweet tangy flavor.  Red grapefruit seems to bring my tastebuds to life with its clean, refreshing, and light taste.  

It is that sweet tart taste that adds extra zing when combined with other flavor profiles in recipes.  For example, spread ricotta cheese over toast, add a few slices of ruby red grapefruit, then drizzle a bit of honey over that, and you’ve got a light refreshing summer breakfast.  Toss slices of grapefruit, along with walnuts, goat cheese and a few slices of roasted beets, into a salad of leafy greens with a light vinaigrette, and you’ve got a tasty lunch or light dinner. You can even make delicious light desserts and baked goods with grapefruit, such as grapefruit buttermilk muffins, grapefruit bars, or even chocolate covered grapefruit slices!  

Photo by Nicola Barts on Pexels.com

Smooth Nutrition 🍍🍌🥝

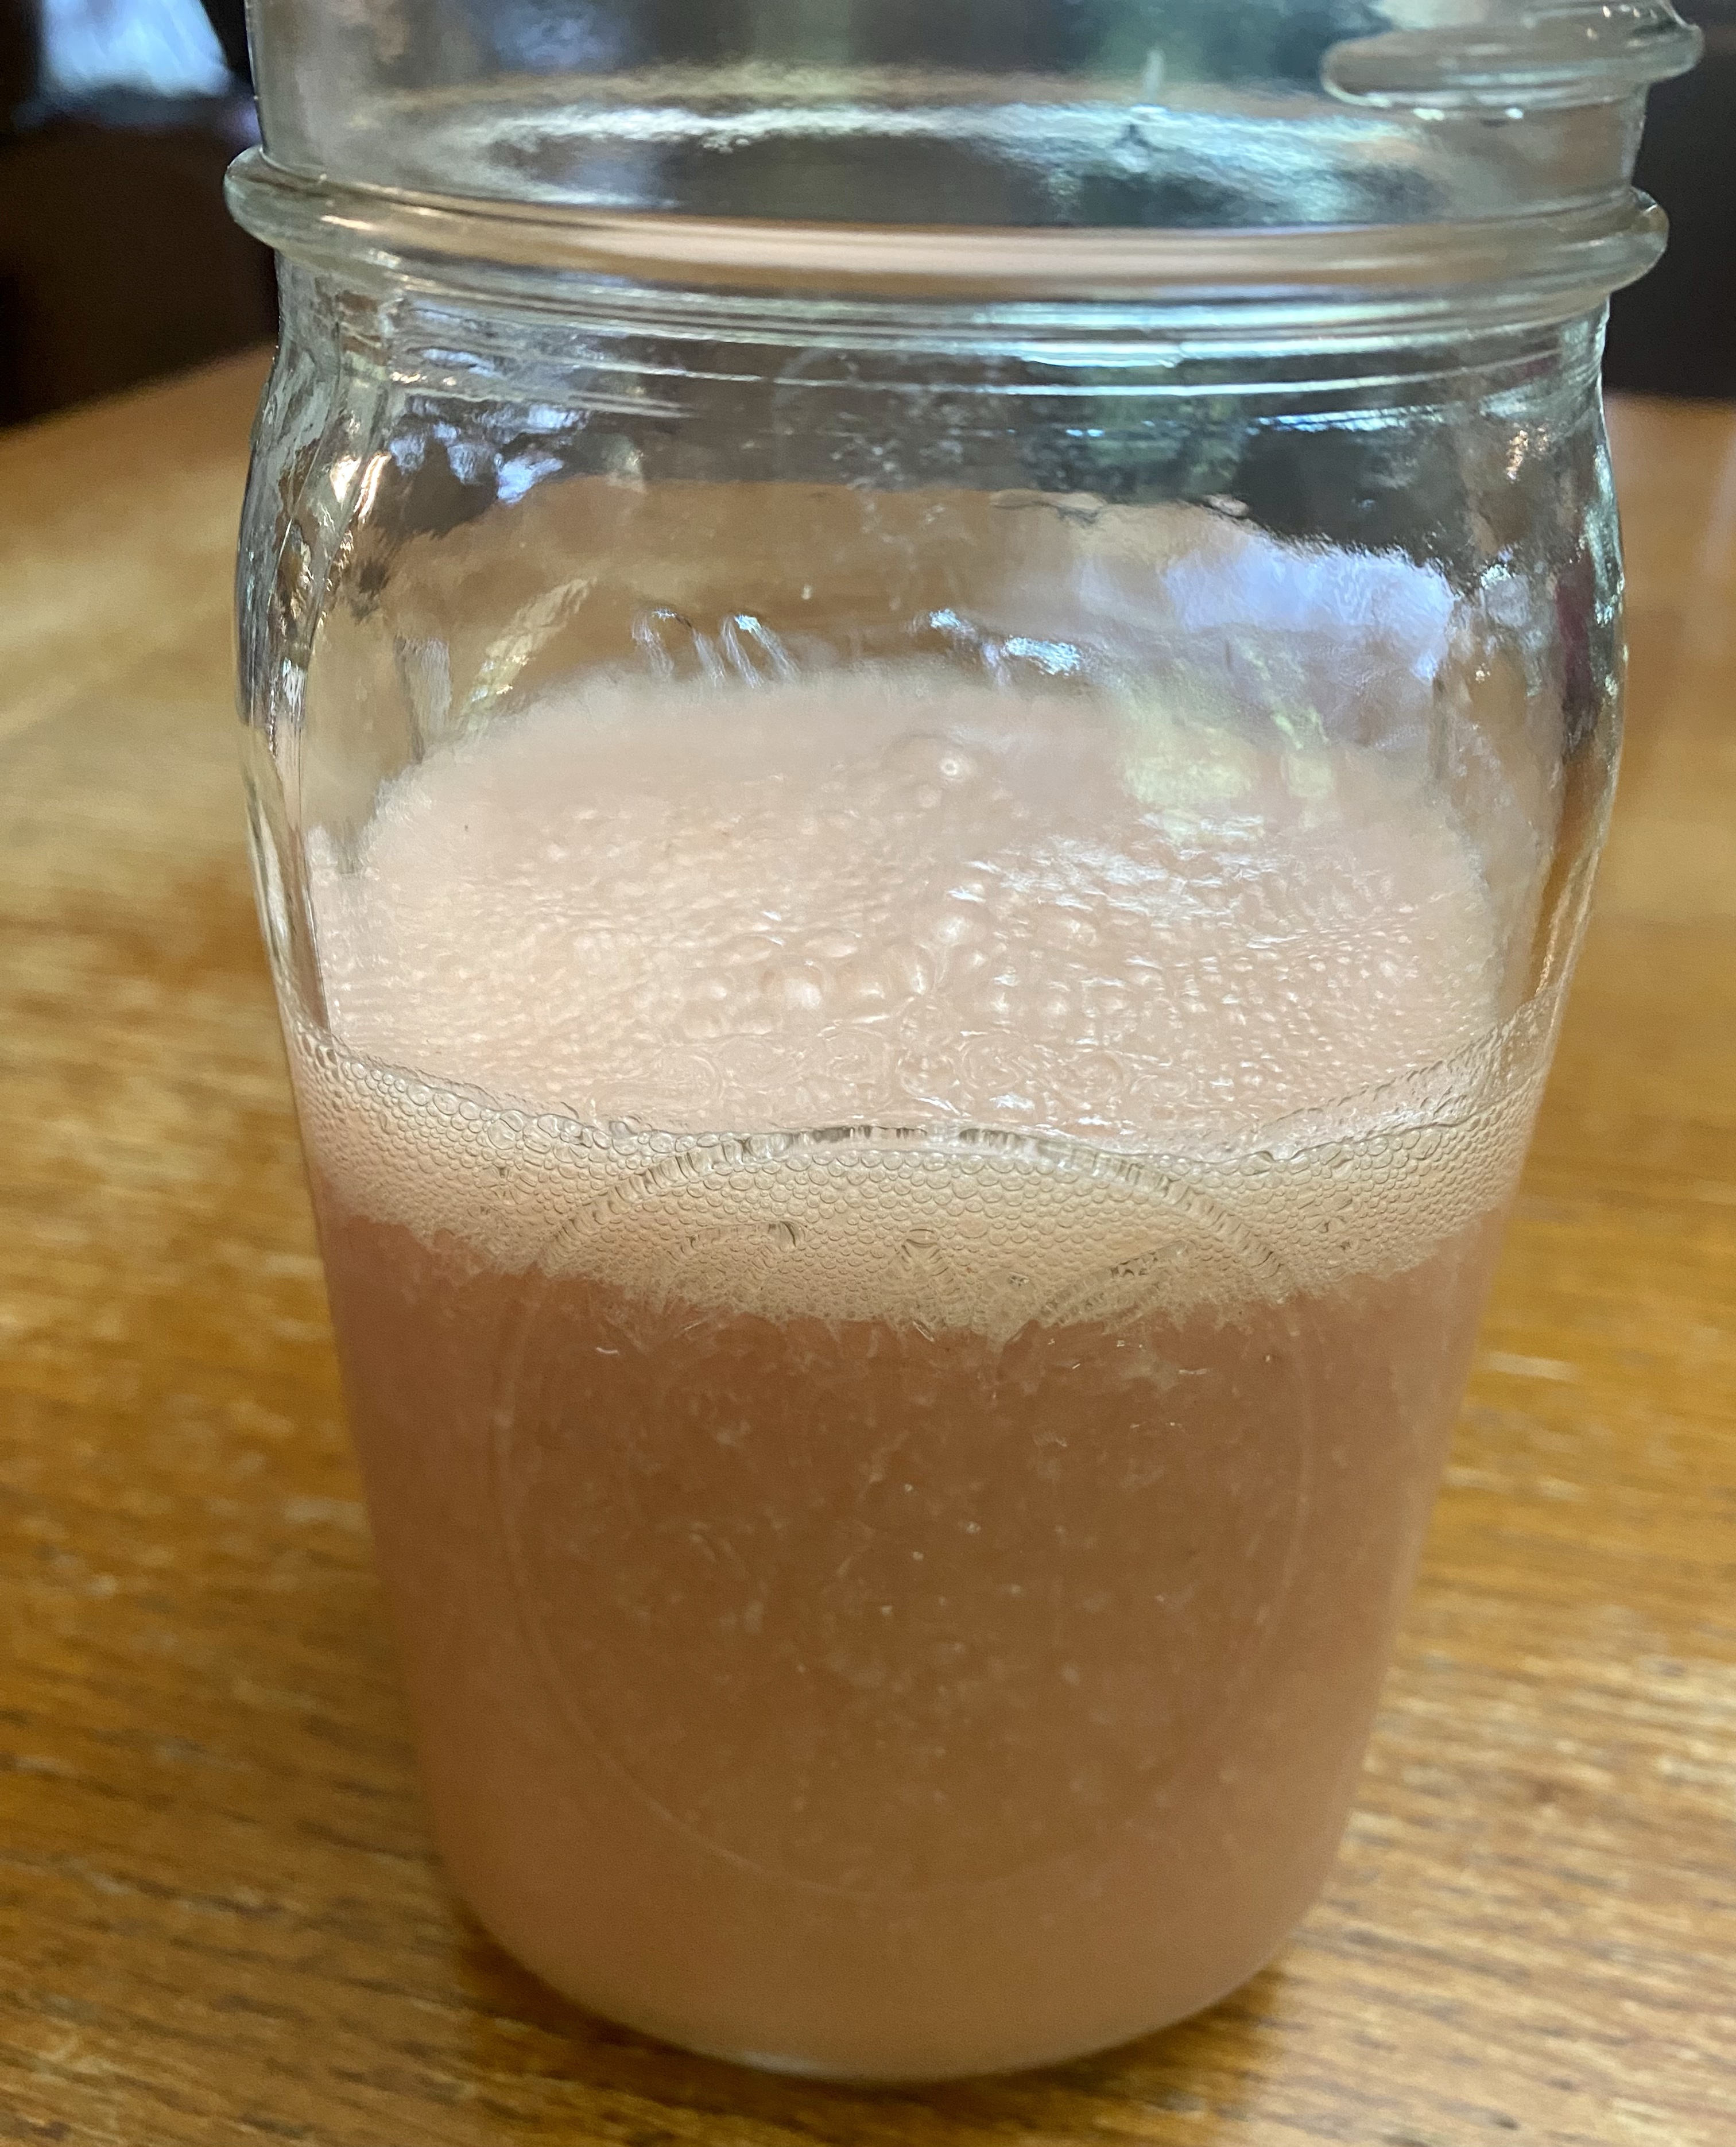
Then again, grapefruit can be added to smoothie recipes for an instant burst of flavor AND nutrition.  I created the recipe I am sharing with you today during the weeks following neck surgery this past spring.  Despite the fact I am fully recovered, this is one smoothie recipe that I still frequently make.  

During my recovery process, I was hyper-fixated on the nutritional content of the foods to enhance healing, but I was having difficulty swallowing.  Smoothies, therefore, became a go-to source of nutrition, and this recipe is uber-refreshing and jam-packed vitamin, mineral, and fiber content.  Specifically, it combine the goodness of grapefruit, which is packed with vitamin C and fiber, with strawberries and one of three fruits–frozen pineapple, banana, or kiwi–depending upon what I have on hand at home.  

One half of a grapefruit contains six grams of fiber and the total daily amount of vitamin C needed by our bodies. The grapefruit gets tossed into a blender with strawberries, which are also high in vitamin C and fiber as well as antioxidants, magnesium and phosphorus.  Then, I take my pick of pineapple, banana, or kiwi, and pitch one of those into the blender. No matter which of the three of those fruits I choose, they are all full of potassium, fiber, and a whole slew of vitamins and minerals. 

Light and refreshing, grapefruit smoothies are perfect for nutrition on the go!

Blend and Go nutrition🥛

Sometimes, for a touch of sweetness, I add in a medjool date, a bit of maple syrup, or pomegranate juice as well as a bit of ginger for its antiinflammatory properties. Depending upon what I am eating that day, I may also add vanilla protein powder, which gives the smoothie a creamy, zesty-sweet taste.  Once all desired ingredients are in the blender, I give it a whirl for about one minute and divide between wide-mouth mason jars or smoothie containers.  And in less than five minutes, I have two refreshing, nutritionally dense smoothies.  Perfect for on-the-go nutrition or a quick, healthy snack.

While grapefruit was once known as the “forbidden fruit,” there is nothing forbidden or evil about it!  Grapefruit is budget friendly, full of tangy zest, and nutritional goodness for your body.  I hope you’ll give this recipe a try!  You just might be surprised!

Zesty sweet, budget-friendly goodness, bursting with flavor AND nutrition, in less than five minutes!

Grapefruit Smoothie

Serves 2

Ingredients:

1 cup frozen riced cauliflower 

1 large ruby red grapefruit, peeled (with some pith remaining), quartered 

1 cup strawberries, fresh or frozen

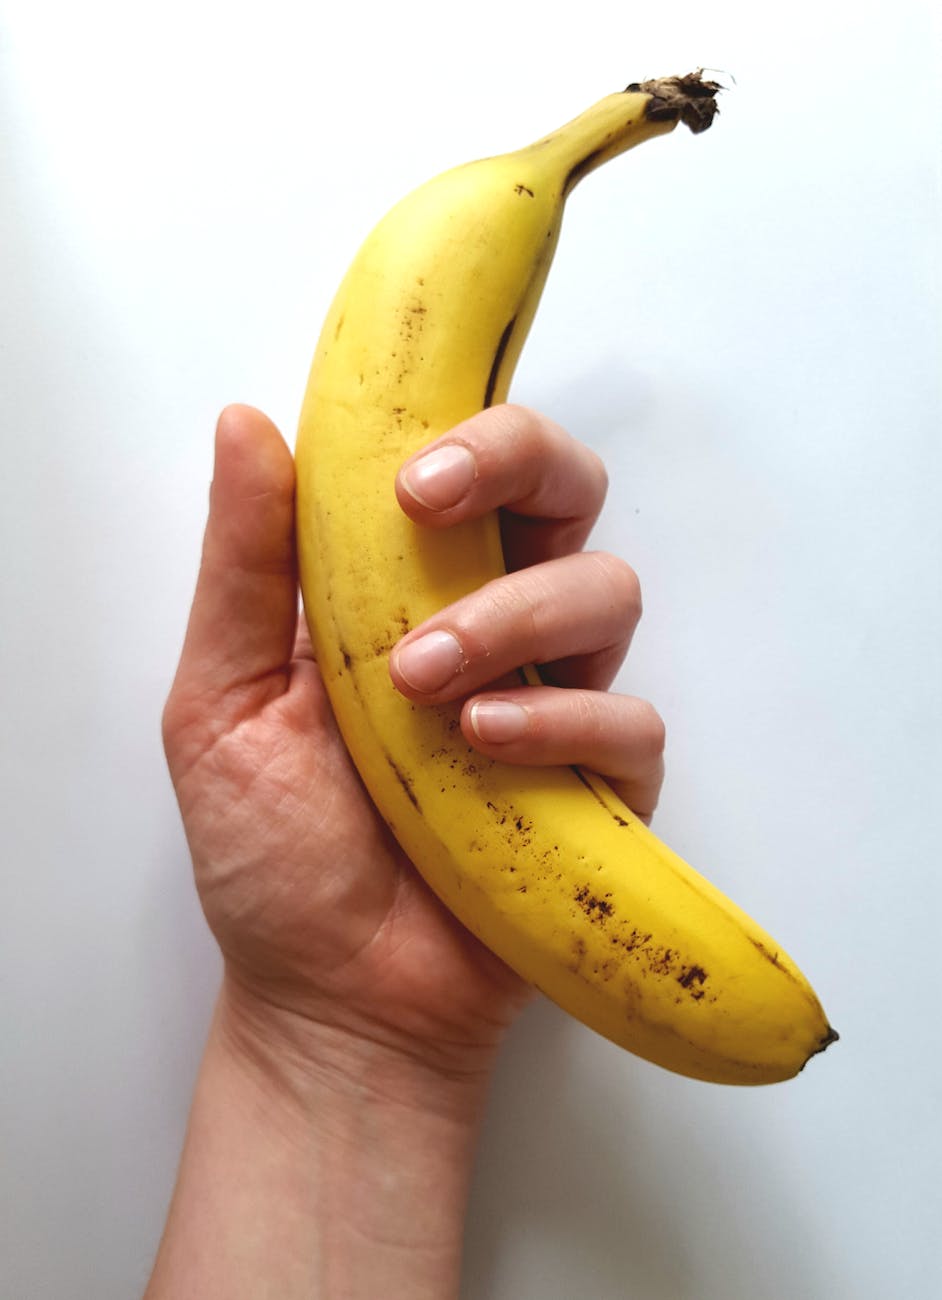
1 cup pineapple, fresh or frozen (or 1 banana or 2 kiwi)

1 medjool date (or 1 teaspoon maple syrup or ¼ cup pomegranate juice) for added sweetness 

¼  teaspoon ginger powder, if desired 

2 cups water (or other favorite liquid)

Optional: 1-2 servings favorite protein powder

Combine ingredients in a high powered blender, adding water last.

Blend for one minute.

Divide between two large smoothie containers or jars.

Can be stored in the refrigerator for up to 3 days; shake well before drinking.

Can also be frozen for up to 3 months, set in the refrigerator overnight to thaw ahead of time.

One pot walnut and mushroom penne, with gluten free option

“One pot meals make a lot of sense . . . because so much of what people hate about cooking is really the clean-up, the mess, the grease.”–Tom Douglas

Photo by Teona Swift on Pexels.com

Autoimmune diseases, according to John Hopkins University, unbelievably affect about 23.5 million Americans, 80% of which are women, of which I am one. While scientists are busy trying to understand the biological gender differences that contribute to this higher prevalence among females, one unexpected discovery is the contributions of the intestinal (gut) microbiome as a driver for these excessive numbers according to Scientific America. Furthermore, those identified with gut-centered autoimmune diseases, including irritable bowel disease (IBD), irritable bowel syndrome (IBS), ulcerative colitis, Crohn’s disease, and celiac disease, tend to have micronutrient deficiencies, in particular iron, folic acid, zinc, vitamins B6 and B12, copper, zinc, and vitamin D–which can really put the microbiome in dysbiosis.  

If left untreated, nutritional deficiencies can lead to an array of other health concerns, such as neurological complications, psychiatric symptoms, cancer, and bone health issues.  This is particularly of concern if adults have not been properly diagnosed.  For example, symptoms of celiac disease often vary from person to person; therefore, it is possible to go decades without identification as was the case with me.  I was in my late forties experiencing numerous unexplained, uncomfortable symptoms before one doctor finally suggested an endoscopy along with a blood test and a colonoscopy.  As it turned out, the endoscopy and blood work both identified celiac disease.

This dramatically changed my life, especially the way in which I eat.  In addition to eliminating gluten, the doctor advised a nutrient-rich, whole food diet, heavily emphasizing fruits, vegetables, whole grains (without wheat, barley, and rye), as well as legumes.  This is because I spent most of my life with malabsorption issues due to the damage of the lining of my small intestine as well as the inflammation and atrophying of the villi that absorb nutrients and minerals. Hence, the reason I was often sick as a young child.

Photo by Pixabay on Pexels.com

Specifically, vitamin D deficiencies are especially high with those who have celiac disease, which is crucial for growth of bones.  Chronic deficiency of vitamin D can lead to cancer, cardiovascular disease, and osteoporosis to name a few. Additionally, zinc is another nutrient often deficient in those with celiac disease. This nutrient promotes wound healing, virus recovery, growth, and development. 

Therefore, how I now choose to cook and eat is heavily influenced by this knowledge.  While, I can’t, per se, play catch up, I am aware of my need to focus on healthy eating and supplementing with a few key vitamins. The recipe below, based upon recipes by Simple Veganista and California Walnuts is reflective of this focus as it is chock full of nutritionally dense plant foods. 

In particular, this recipe emphasizes foods high in zinc, such as walnuts, mushrooms, spinach, and legumes as the pasta I use is made out of chickpea flour.  Mushrooms, especially those grown under UV light, are one of the few non-animal sources of vitamin D. Additionally, walnuts benefit gut, heart, and brain health while spinach (or other green vegetable I may use) is rich in flavonoid antioxidants and vitamins and possesses anti-inflammatory properties. 

With or without an autoimmune issue, we can all benefit from eating more healthy, homemade meals.  These meals don’t have to be complicated or time consuming and can even be completed in one pot as demonstrated in this recipe. Feel free to swap out the chopped walnuts with your favorite ground meat or meat alternative.  Don’t want spinach? Replace it with another favorite green vegetable. The point is eating healthfully doesn’t have to be hard, tasteless, or make clean-up challenging.  One pot and you’re done! 

From my home to yours, I wish you the best in health!

One pot Walnut and Mushroom Penne (with gluten free option)

Ingredients:

1 tablespoon olive oil

1 cup chopped onion

2 teaspoons minced garlic

1 pound mushrooms

1 tablespoon tomato paste

1 tablespoon balsamic vinegar

1 tablespoon dried oregano

1 tablespoon dried basil

¼ teaspoon black pepper

¼ red pepper

½ teaspoon fennel seed, options

1 28-ounce can crushed tomatoes

1 cup chopped walnuts*

1 cup chopped fresh or 14.5 ounce canned tomatoes

4 cups low sodium vegetable broth

1 pound penne pasta (I use gluten-free, chick-pea pasta.)

2 cups fresh spinach or other favorite green vegetable

Directions:

In a large pot, heat oil over medium heat. (Can also use ¼ cup water if you prefer oil-free cooking.)

Add in onion and garlic, saute until translucent. (If using water, you may need to add more water to prevent sticking.)

Stir-in mushrooms and cook until soft, stirring occasionally.

Stir-in tomato paste, balsamic vinegar, oregano, basil, black pepper, red pepper, and fennel, if using.

Add crushed tomatoes, walnuts, and chopped tomatoes and bring to a boil.

Reduce heat and stir in vegetable broth and pasta.

Allow to simmer and gently bubble for 15-20 minutes, stirring occasionally.

Remove from heat, stir in spinach or other green vegetable.

Allow to rest 3-5 minutes, then divide between 4 serving bowls.

Sprinkle with your favorite topping, such as parmesan or pecorino cheese, fresh parsley, and/or chopped scallions. 

Notes: 

*Walnuts can be swapped out with your favorite ground meat or meat alternative.

Spinach-Artichoke Dip with plant-based and gluten-free options

“Popeye was right about spinach: dark green, leafy vegetables are the healthiest food on the planet. As whole foods go, they offer the most nutrition per calorie.”–Michael Gregor

“You’re not going to believe what I ate, Mom!”

I was talking with my daughter, Madelyn, on the phone.  She is attending graduate school, and she was describing a dinner that a friend had prepared for one evening during a break from her studies.  

“Spinach and artichoke dip!  Not only that, Mom, but it was vegan, and it was surprisingly good . . . and you know how funny I am about texture and taste.”

Maddie went on to insist that I would have to make this dip when she was home for the holidays.  In fact, she had already asked her friend to share the recipe with her, so she could send it to me.  She went on to explain how her friend has lupus, and eats an anti-inflammatory diet that focuses heavily on fruits, vegetables, nuts, seeds, and a few select whole grains in order to reduce her inflammation.  

As I listened to her continue to describe the dip, my mind was already thinking about the ways I could adapt the recipe.  I was eager to, ahem, dip into reading various plant forward recipes and techniques in order to create my own version.  Not only did I want to make the dip in honor of my daughter’s request, but also because the dip is largely made up of two of my favorite vegetables: spinach and artichokes.

Photo by Jacqueline Howell on Pexels.com

Maddie’s friend was on to something.  Both artichokes and spinach are highly anti-inflammatory.  Spinach, specifically, is chock full of vitamins, such as A, K and C, and it also contains folate, magnesium, iron, potassium, calcium, and small amounts of other B vitamins. It is high in fiber and low in calories.  Spinach is also high in antioxidants, supports brain and eye health, has been shown to protect against certain diseases, and helps to lower blood pressure when regularly consumed.  

Photo by Andie on Pexels.com

Artichokes are no joke either. They, too, are full of vitamins, including folate, magnesium, manganese, potassium, as well as vitamins K and C.  Like spinach, artichokes are high in fiber, full of antioxidants, and have been shown, when consumed daily, to help regulate blood pressure. Additionally, artichokes promote liver health and are a unique source of prebiotics, which are beneficial gut bacteria that can boost immunity, assist in digestion, and benefit mood.

Of course, I can share all the benefits of these two nutritional, anti-inflammatory powerhouses, but let’s be honest, for most people, myself included, it’s all about the taste. Does this dip taste good, in addition to being made with beneficial ingredients?  Is it worthy of being shared with others?   

I had my favorite taste tasters, and pickiest eaters, Maddie, and my husband, John, taste the dip, and miracle of all miracles, they both liked it!  Maddie, the pickiest of the two, said she loved it just as I made it.  Her only wish was that we had baguette crackers like her friend served it with.  John, typically not as picky, filled up and ate a big soup bowl worth of dip; however, he added both parmesan and mozzarella cheese to his bowl because he, “wouldn’t want to eat too healthy over the holidays!”  Meanwhile, I served up the dip on a plain baked potato for my dinner, and let me just say that was one tasty dish!

Whether you make it with, or without dairy, you’re still packing a healthy punch of powerful, propitious plants. Serve it up for your next favorite gathering and watch it disappear.  No one ever has to know the dip benefits their health too! 

From my home to yours, may you have a prosperous and healthy 2023.

Spinach Artichoke Dip

Plant-based with dairy-free and gluten-free options

Ingredients

1 cup (raw) cashews, soaked overnight or at least 4+ hours

1 ¼  cup Greek or plant-based Greek yogurt (can substitute with mayonnaise)

¼ cup water

12-16 ounces (1 package) frozen spinach, thawed and drained

1 14 ounce can artichokes, drained and chopped

⅓ cup finely chopped onion

2 teaspoons minced garlic

1 tablespoon freshly squeezed lemon

1 teaspoon braggs liquid aminos (or soy sauce, if don’t need gluten free)

 ½ teaspoon salt, or to taste

½ teaspoon onion powder

½ teaspoon pepper

Optional additions: Mix in up to 4 ounces or ½  cup of any of the following ingredients:

cream cheese (or vegan variation), parmesan/romano/pecorino cheese, soft goat cheese, and/or mozzarella cheese, if desired

Directions

Preheat oven to 400 degrees

Coat a small casserole dish with cooking spray (2 quart size).

In a food processor or high speed blender, blend cashews, yogurt and water until creamy, about 1-2 minutes.

Add cashew mixture to a large mixing bowl and stir in the rest of the ingredients.

Spread dip evenly in the casserole dish.

*Bake 20-30 minutes, or until top turns golden brown

Serve warm with veggies, tortilla chips, crackers, smear over your favorite toasted bread, or even a baked potato.

Store leftovers in an airtight container and refrigerate.

Serve warm with crackers, tortilla chips, or baguette chips

*Serves 6-10 as appetizer

Get into the holiday baking mood with Banana Strawberry Bread with optional chocolate chips–with gluten-free and vegan options

“As long as you know how to bake, life is sure to be sweet!”–Unknown

One Sunday afternoon this past summer, I was talking with my Dad via phone as he now lives in Florida.  He shared that after church service, a fellow worshiper shared slices of homemade strawberry bread with others.  Listening to Dad, I decided to add “strawberry bread” to my list of writing/cooking ideas.  Of course, Dad was not surprised.

It took some trial and error, but I think I found the sweet spot.  Of course, when I bake, I am trying to meet unique dietary needs.  Selfishly, I prefer baking recipes that have the ability to be gluten free due to my celiac disease; however, I also like to find versatile ingredient scaffolding for those that can safely consume wheat.  Furthermore, I choose to eat plant-based; therefore, I also like to play with ingredients that offer that option as well.  Bottom line, however, if it tastes good and is easy to make, most people don’t care if it’s gluten-free and/or plant-based. 

Photo by solod_sha on Pexels.com

The recipe all came together after picking up a grocery order one day only to discover I was given extremely ripe, fully brown bananas instead of bright yellow.  Once I saw those bananas, I knew how I wanted to create my own version of strawberry bread.  I took further inspiration from The Big Man’s World website.  

Strawberries and bananas are complementary and commonly paired in many food items, such as drink mixes, smoothies, yogurts, fruit-cups, and so forth.  Additionally, bananas are one way to bake without eggs to bind ingredients together into a batter with a creamy texture and balanced moisture composition.  Furthermore, bananas add a subtle sweetness to baking recipes that tends to compliment many ingredients.  

Photo by Kimona on Pexels.com

When baking without eggs, I also add a tablespoon of vinegar.  This depression era egg replacement reacts with the baking soda to create carbon dioxide that helps baked goods rise as they bake.  Plus, vinegar overall improves bread texture, whether baking with or without eggs.

You may notice that I use date sugar in this recipe, although it can be replaced with your preferred form of sugar. Date sugar is considered less processed due to the fact that it is made from dried dates pulverized into a powder; therefore, it retains much of its fiber and nutrients.  That said, don’t be fooled, it is still sugar, and like any sweetener, it should be consumed in moderation.

If you like to bake for the holiday season, this bread will lend itself to potluck gatherings, as it can be made a day or two ahead of time.  It would also make a nice holiday gift or simply a fun weekend addition to brunch.  It stores well, becoming more moist with age. I have toasted leftover slices of it in my air-fryer and reheated it in the microwave–either way works.  Plus, you can substitute your favorite chopped nuts in lieu of the chocolate chips–I just happen to like chocolate!  It’s tasty plain or smeared with butter or cream cheese as my daughter and husband  do or with your favorite nut butter, as I like to do.

This recipe is versatile, using fresh or frozen fruit. (Hint: I save all over-ripe bananas–and even strawberries–in a freezer bag in my freezer and pull out what I need anytime I’m baking!) Notice all the ways I offer substitutions for the original ingredients I used, so that you can meet your own individual needs/taste preferences.  Sprinkle the top of the batter with crystallized or festive-colored sugar before baking if desired and find ways to make this recipe your own!

From my home to yours, here’s to holiday baking!

Banana Strawberry Bread with optional chocolate chips

 with gluten free and vegan options

Ingredients

2 cups oat flour, can replace with all-purpose or gluten free flour

1/2 cup date sugar, can replace with regular or brown sugar

¾ teaspoon baking soda

¼ teaspoon salt

1 ½ cup mashed banana (about 2 bananas)

1/4 cup applesauce, can replace with oil or melted butter

1 teaspoon vanilla extract

¼ cup milk, dairy or non-dairy work

1 tablespoon apple cider vinegar

½ + ¼  cup + sliced strawberries, frozen or fresh

¼  cup + 1 tablespoon chocolate chips, gluten free and/or vegan; 

(can replace chocolate chips with chopped nuts)

Directions

Preheat oven to 350 degrees

Prepare loaf by spraying with nonstick cooking spray

Mash banana and set aside

In a large mixing bowl, stir together dry ingredients

Make a well in the center of the dry ingredients

Stir in remaining ingredients, including banana, into the dry EXCEPT for strawberries and chocolate chips

Fold in ½ cup of sliced strawberries and ¼ cup of chocolate chips

Pour batter into loaf pan

Top with remaining strawberries and chocolate chips

Bake for 50-70 minutes or until a toothpick inserted in the center comes out clean

Cool in pan for 10 or so minutes, use spatula to gently lift out of the loaf pan.

Finish cooling on wire rack

Slice to serve.

Can be kept in an airtight container, once completely cooled, in the fridge for up to five days.

Can also be stored in a ziplock freezer bag and frozen for up to 3 months.

In a large bowl stir together dry ingredients and make a well in the center. Then set aside.
In a medium bowl, stir together wet ingredients.
Pour wet ingredients into the center of dry ingredients and mix with spoon until blended.
Finally, stir in sliced (or chopped, if preferred) strawberries and chocolate chips or nuts.
Bake in oven, and allow it to cool in pan at least 10 minutes before using a spatula to gently lift out loaf. Set loaf on cooling rack, and allow it to continue to cool.
Slice it up and eat it plain or with your favorite toppings, such as maple syrup, honey, nut butter, butter, or cream cheese to name a few.
Personally, I love nut butter smeared on a heated slice and allow the warmth of the bread to melt it.

Fudgy, Healthier Brownies (With Black Beans)

“The primary reason diseases tend to run in families may be that diets tend to run in families.”–Michael Greger, How Not to Die: Discover the Foods Scientifically Proven to Prevent and Reverse Disease

When I read the above quote, it gave me reason to pause.  Hmm.  Reflecting on the generations that I knew within my family lineage, I realized three things.  One, I came from excellent cooks on both sides of the family.  Two, heart disease, cancer, and Alzheimers/dementia were clearly present on both my paternal and maternal sides of the family.  Thirdly, those same two facts could pretty much be applied to most of my husband’s, John, family heritage.

Photo by Pixabay on Pexels.com

Let’s be honest, food is often the center of gatherings, events, and holidays.  While food is nourishing to the body, it is also comfort, warmth, love, and care, all wrapped up in a flavorful and aromatic quilted blanket of tradition.  Every family has their own unique variation of food traditions.  Even in families where the art or time for cooking has been lost, there are still food-centered events.  People love food, and why not?  

Unfortunately, food doesn’t always love us back–depending upon the foods we choose to eat, the portions we consume, and the beverages we down with it.  That said, I am not writing to push any one way of eating, cooking, or approach to food in general.  It is my firm belief that lifestyle and diet is an experiment of N = 1. Everyone has a unique genetic make-up, body, and life circumstances, so who am I to know what works best for each individual.  However, I do think most can agree that consuming more plant based foods is never a bad thing.

Photo by Jb Jorge Barreto on Pexels.com

One of my most treasured family recipes is my Grandmother Helen’s brownies.  It is the go-to recipe I make for special occasions, and it is most often requested by my daughter, Maddie.  In fact, I created a gluten-free variation of it, so that I, too, can enjoy this wonderful and scrumptious treat.  Thus, it was the combination of the quote above and my love for my grandmother’s brownies that led me to the research I used as motivation to cobble together this recipe variation for brownies that includes more plant based foods and uses less sugar.  

I give credit and inspiration from the following sites: chocolatecoveredkatie.com, dailydozenmealplans.com, nutritionfacts.org, busbysbakery.com, and The Jaroudi Family on Youtube.  Their recipes, combined with my own experience, gave birth to this healthier variation of my grandmother’s brownies.  Don’t get me wrong, I still plan to bake Grandmother’s Helen’s version for special occasions–there’s no replacing it; however, this recipe will do, as Grandmother Helen used to say, “in a pinch,” in order to satisfy my sweet tooth, but still sneak in the healthful benefits of a few more plants into my day.

Photo by Isabella Mendes on Pexels.com

 From my heart to yours, I appreciate you reading this and wish you much health and vitality!  I hope this will be a recipe you try! However, based upon my experience, you may not want to let your tasters know there are black beans in the brownies until AFTER they’ve eaten it!  I’d love to hear your thoughts, and be sure to share your variations with me.

Recipe below pictures ⬇️

The humble black bean can be transformed into a fiber-rich, AND delicious, sweet treat!
You can mash those black beans with your high powered mixer!
Bake them up in a pan lined with parchment paper or nonstick spray.
Then dive into the ooey-gooeyness!

Fudgy, Healthier Brownies (With Black Beans)

Ingredients:

1 15-oz can black beans, drained and rinsed

2 fleggs* (can substitute with 2 eggs)

¾  cup cocoa powder

½ cup oats

½ cup applesauce (can substitute with ¼ cup vegetable oil)

½ teaspoon salt

½ cup sugar

1 tablespoon vanilla extract

1 tablespoon vinegar (apple cider or white)

1 teaspoon baking powder

1 teaspoon baking soda

½ cup or more chocolate chips

Optional: ½ cup chopped walnuts, pecans, hazelnuts to sprinkle on top of batter before baking OR 2-4 tablespoons of peanut or almond butter mixed into the batter before baking

Instructions:

If using flaxseed (fleggs) instead of eggs, add 2 tablespoon flaxseed to a small bowl, and add in 6 tablespoons of water.  Stir and place in the fridge for 5 minutes. 

Prepare square baking pan (8 x 8 or 9 x 9) by lining with parchment paper or spraying with nonstick cooking spray

Preheat the oven to 350 degrees.

In a food processor, high speed blender, or with a quality mixer set on higher setting, mash beans. (You can also do this by hand.)

In a large bowl, mix mashed beans with the rest of the ingredients EXCEPT chocolate chips and nuts if using. 

If using almond or peanut butter, it SHOULD be mixed into the batter.

Using a spoon, gently fold in chocolate chips (and/or nuts if desired) into the batter.

Pour batter into the prepared pan.  Add more chocolate chips and/or nuts if desired on top for decorative effect.

Bake for 20-25 minutes or until brownies begin to pull away from the sides of the pan.

Allow to cool 10+ minutes before serving.

Store leftovers in the fridge.  These brownies magically get better after a day in the refrigerator!